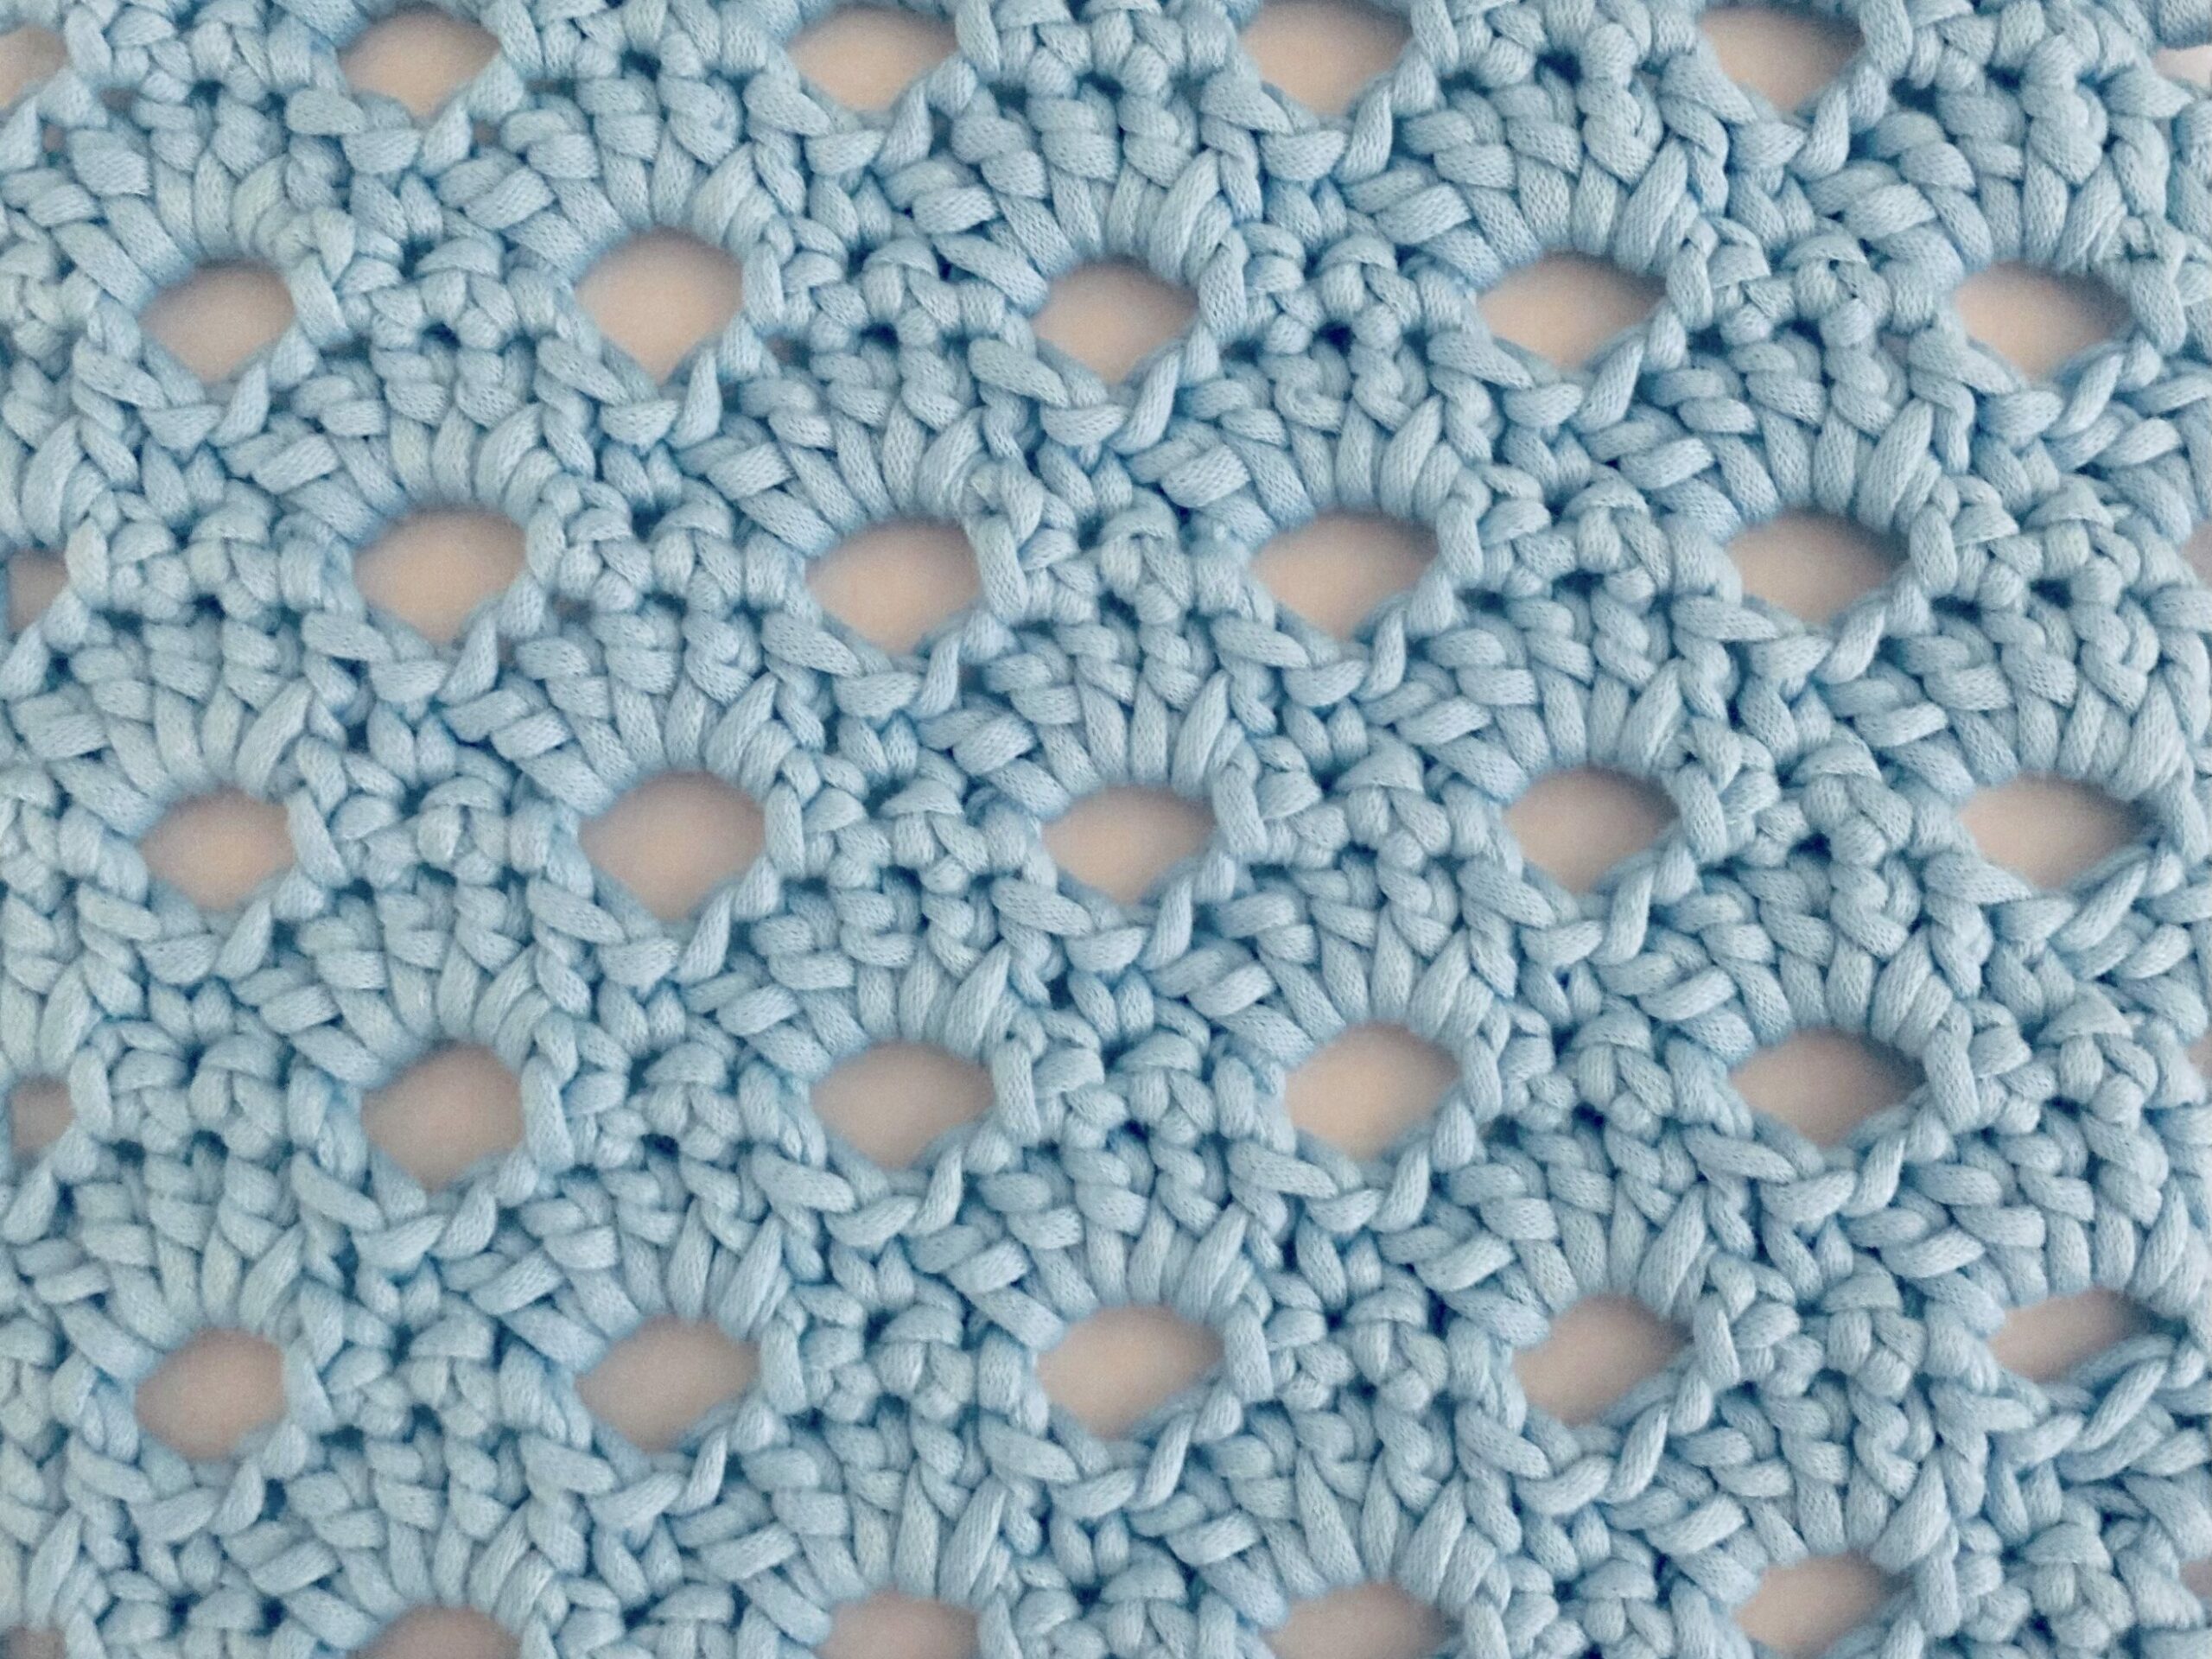
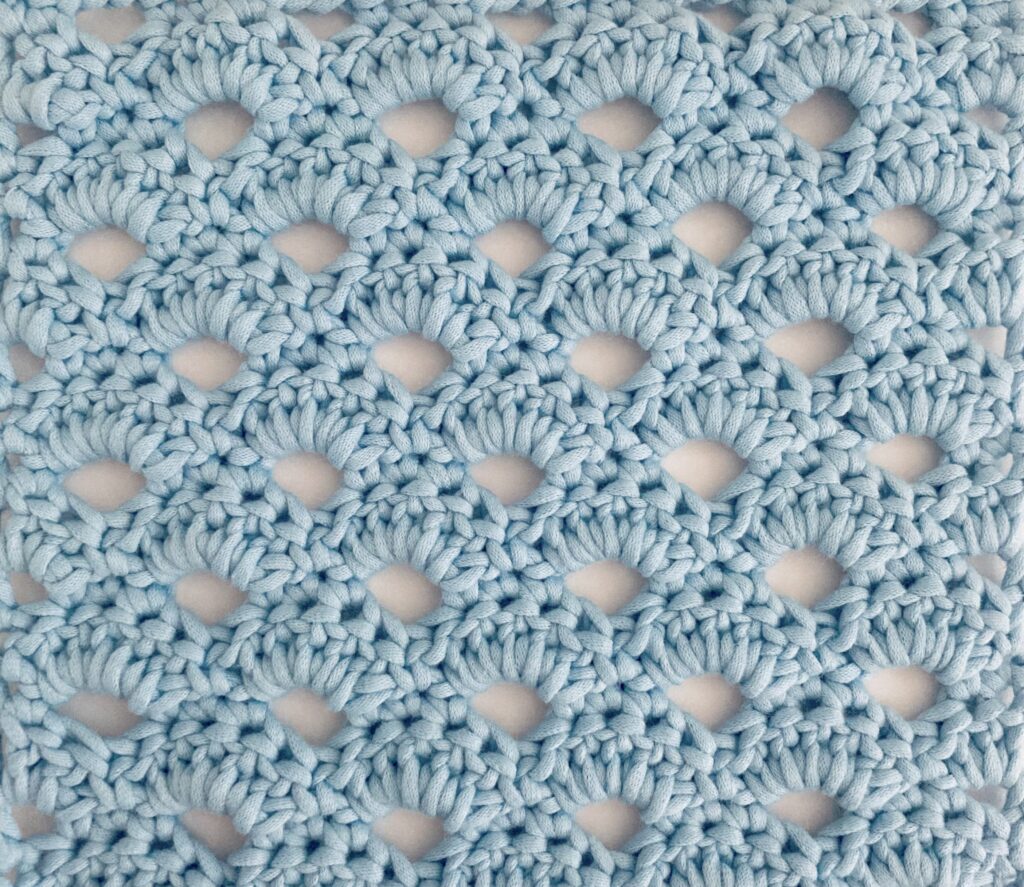
Did you know that a series of arches is known as an “arcade” in architecture? I didn’t know either, until I heard about it in an Art History course. Whenever I crochet the Arcade Stitch, I remember that the name of this stitch is related to architecture. The fact that crochet is related to other disciplines is what makes it so wonderful to learn! The Arcade Stitch is great because it looks complex, but makes an airy and chic fabric using a couple of basic crochet stitches that can be easily learned. The Arcade Stitch is also known as the Wheatsheaf Stitch. I think the Arcade / Wheatsheaf Stitch is one of those stitches that really makes a crochet project pop because of how unique and intricate it looks. Without further ado, let’s get right into this tutorial so that you too can make some wonderful projects with Arcade / Wheatsheaf Stitch!
Stitch Multiple
The foundation chain to crochet the Wheatsheaf Stitch is 5 + 2. This means that you should first crochet a multiple of 5 chains, such as 5, 10, 15, 20, 25… etc. Then you should crochet 2 chains on top of that number. For the swatch shown in the photo above, I decided to crochet 25 + 2 chains. For this tutorial, I will crochet 20 + 2 chains.
Row Repeat
This stitch pattern for the Wheatsheaf Stitch has a four row repeat. In the photos below, I will demonstrate the first five rows. If you choose to continue to work in this stitch pattern, or you plan on making a much larger swatch or project using the Wheatsheaf Stitch, you would have to repeat rows 2 through 5 every four rows. That’s why this stitch pattern has a four row repeat.
Prerequisites
You should know the following stitches for this stitch tutorial on how to crochet the Wheatsheaf Stitch:
- How to Crochet a Chain (ch) for Beginners – Photo Tutorial
- How to Crochet A Slipknot for Beginners (with Pictures)
- How to Single Crochet for Beginners – Step by Step Photo Tutorial
- How to Half Double Crochet for Beginners (with Pictures)
- How to Double Crochet for Beginners – with Pictures
Materials
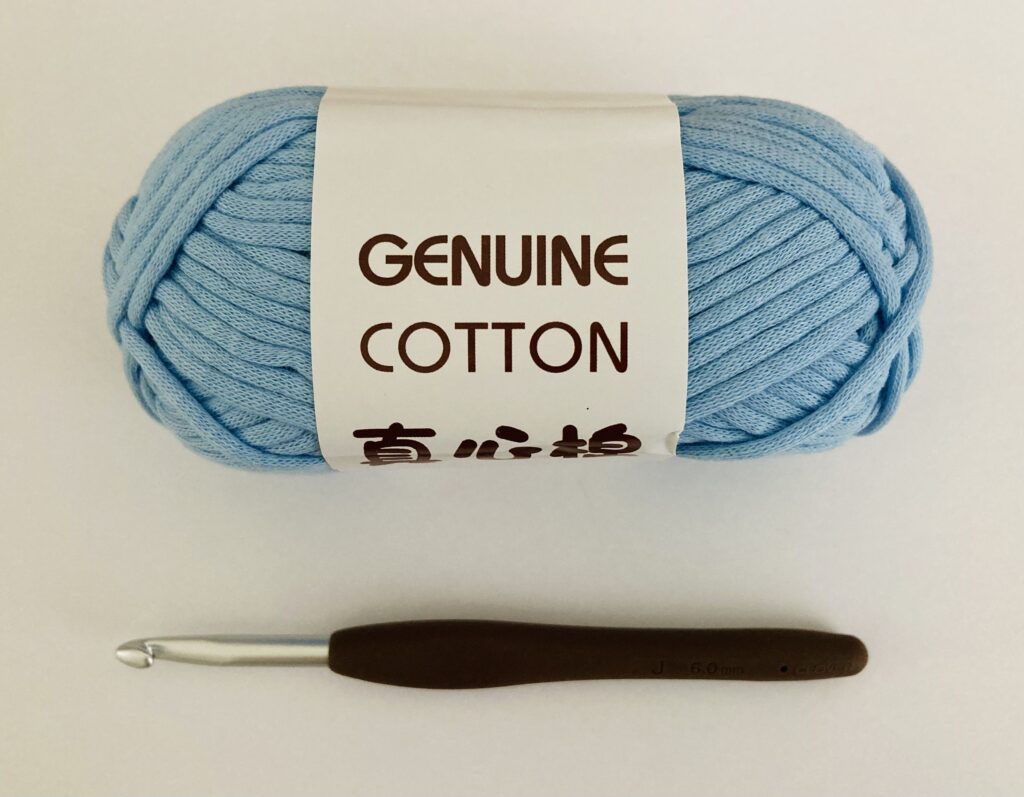
- 6.00 mm Clover Crochet Hook – I decided to use this crochet hook because it is absolutely lovely to crochet with it. It glides through yarn, which I suspect is because of the matte hook head. This makes it so much easier and more efficient to crochet large projects! Although the price point for each of these hooks is a little steep, I highly recommend you check them out if you are willing to invest in your crochet journey. They also come with an ergonomic handle, which makes it amazing to use if you have hands that get tired or achy when crocheting for long periods of time. Even if you choose not to get this particular hook, I recommend you look into getting ergonomic crochet hooks. Ergonomic equipment is overlooked most of the time, but it has priceless benefits for your health and shouldn’t be overlooked in my opinion. Happy wrists means more crocheting for a longer amount of time, which is why it is paramount to consider buying crochet equipment that is beneficial for your health!
- Chainette Yarn from Temu – I used this wonderful chainette yarn from Temu for this tutorial. So far, I’ve used chainette yarn in every single stitch tutorial that I have published on this website. This is because I absolutely love the way the stitches look when you crochet in chainette yarn. The stitch definition is amazing, and makes the crochet really pop! Chainette yarn is also great for beginner crocheters because undoing your yarn won’t make the yarn fray or come unspun. In other words, the integrity of the yarn doesn’t suffer when you use chainette yarn.
Wheatsheaf Stitch vs. Arcade Stitch
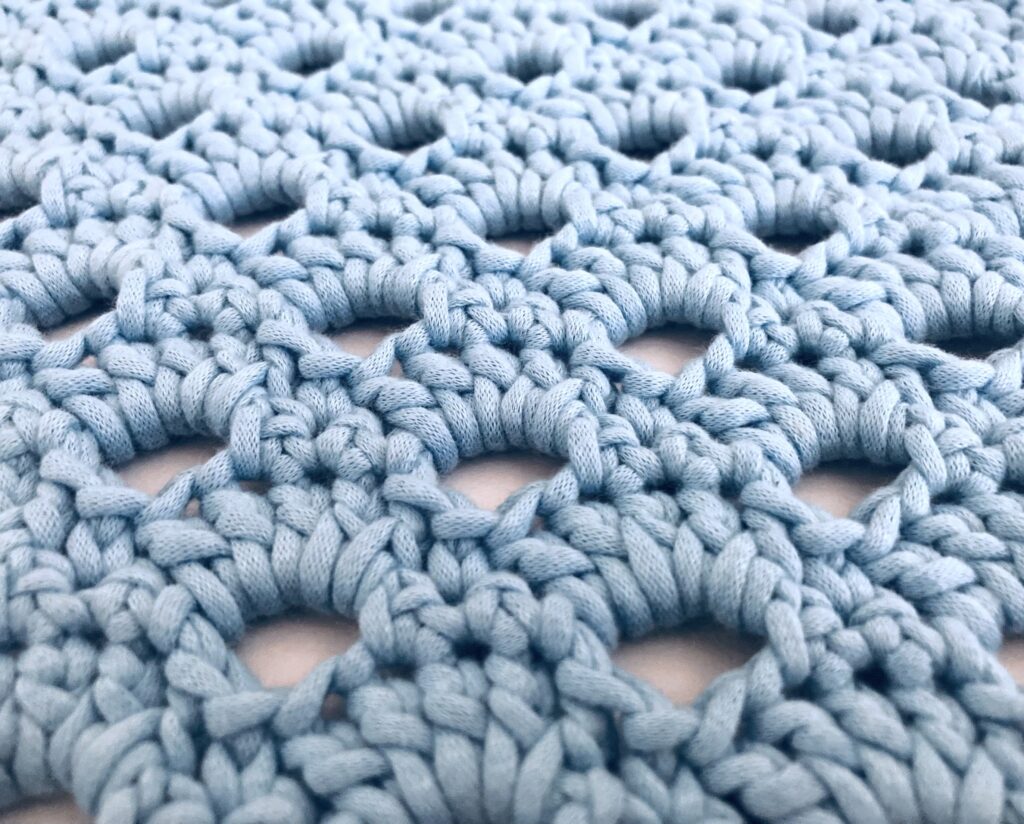
The Wheatsheaf Stitch and the Arcade Stitch are the same stitch. In some tutorials, you will see that a different number of double crochets will form the arch of each stitch. Despite this, the procedure to make these stitches is the same. I have seen multiple tutorials on the internet which use the name “Wheatsheaf Stitch” and “Arcade Stitch” interchangeably. I wanted to include this section to explain that both of these stitches are the same, but they can be known by two different names. It’s similar to the phenomenon we saw with the lemon peel stitch, which is also known as the granite and seed stitch.
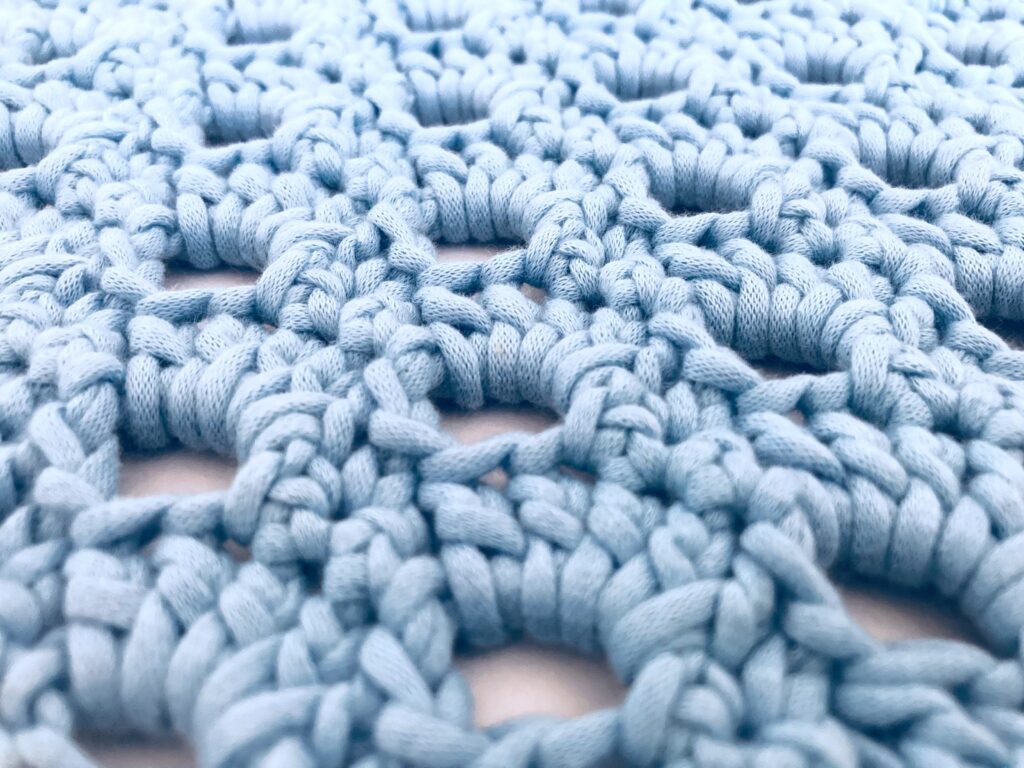
If you’d like, you can vary the number of double crochet stitches for each arch in this stitch pattern, but for this tutorial, each arch will consist of five double crochets. This is because using a larger amount of double crochet stitches than five double crochet stitches for each arch would also vary the number of stitches that you would normally crochet single crochet stitches in. If this doesn’t make sense right now, that’s totally fine! It will hopefully make more sense in the stitch tutorial and photos shown below.
How to Crochet the Wheatsheaf / Arcade Stitch
Row 1
Step 1: Chain 20 + 2
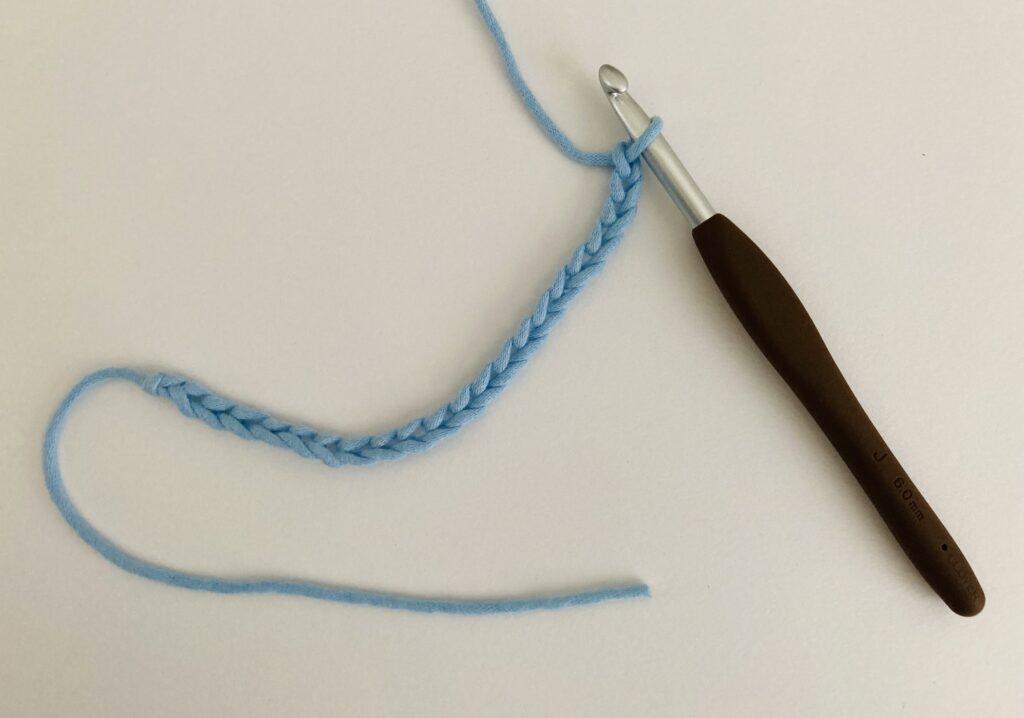
Step 2: Single crochet in the second chain from hook, and single crochet in the next stitch.
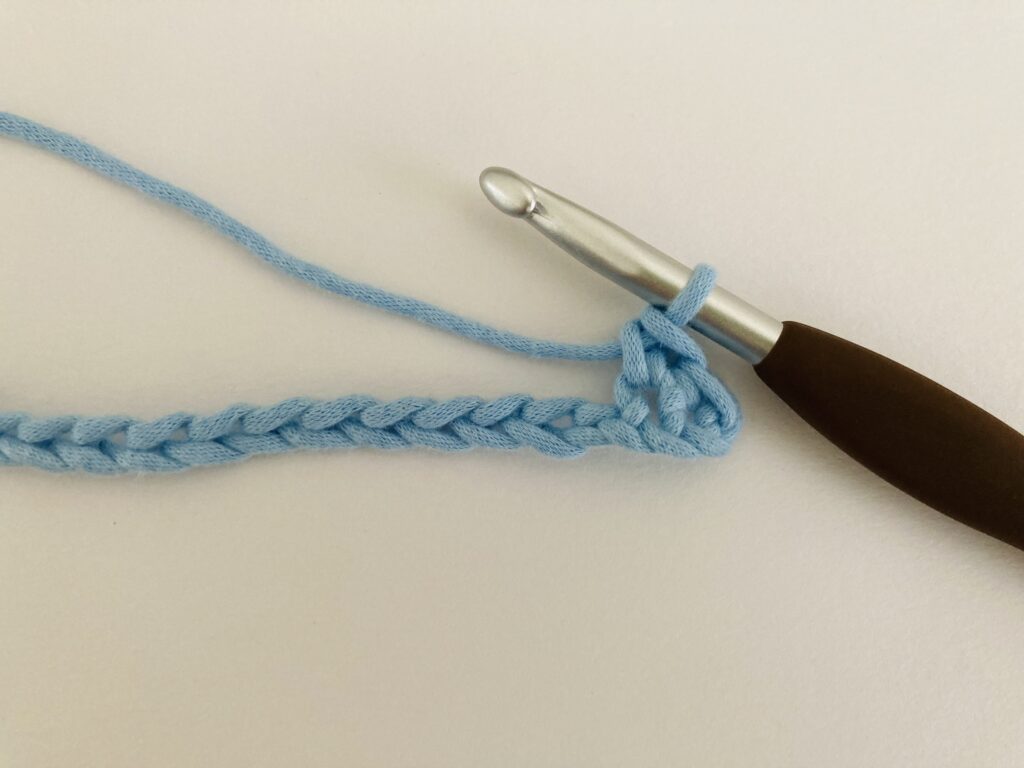
Step 3: Chain 3, skip 2 chain stitches, single crochet in the next 3 stitches.
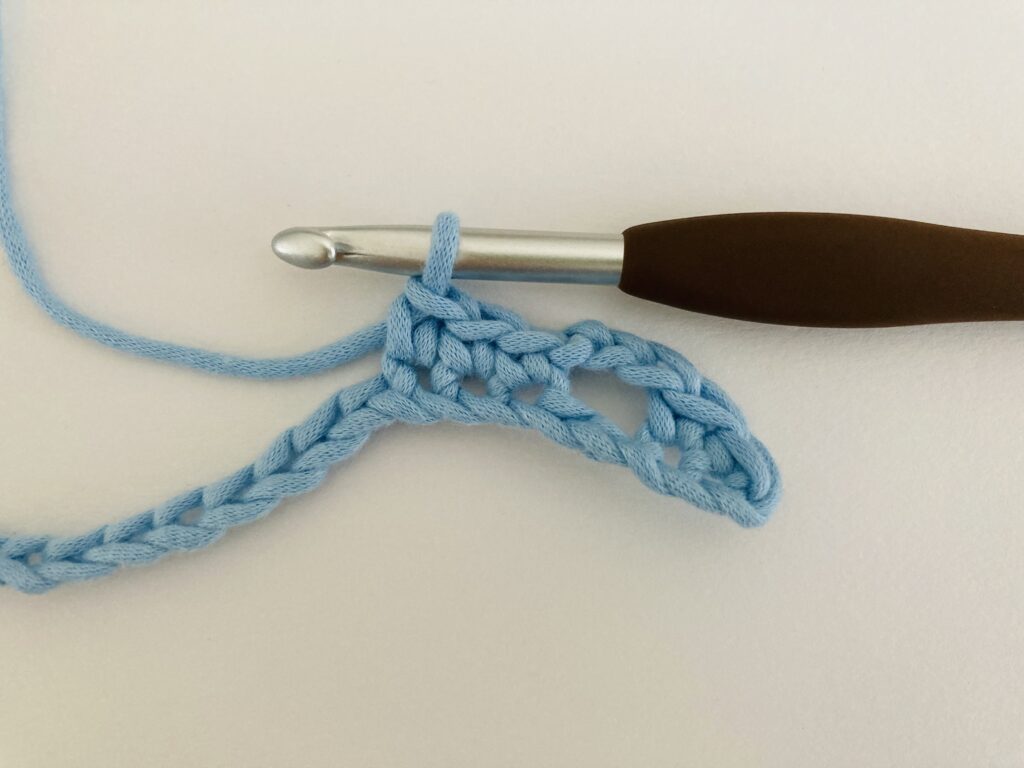
Step 4: Repeat Step 3 across until you reach the end of the row and need to stop at the chain 3.
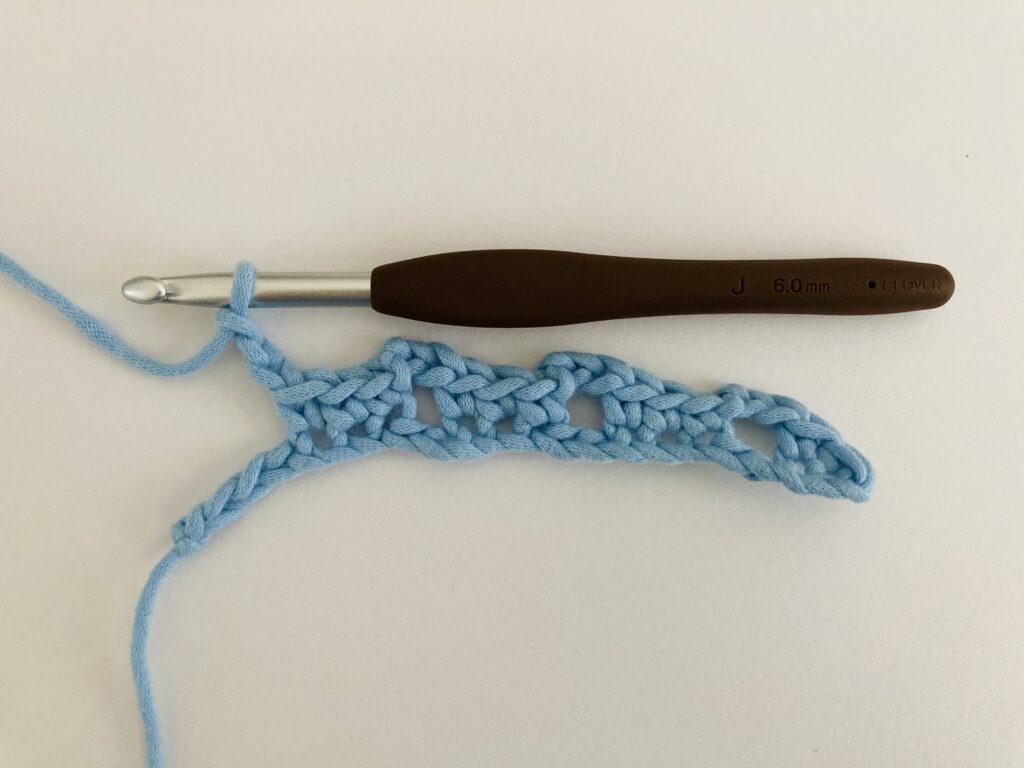
Step 5: Single crochet 2 in the last two chains.
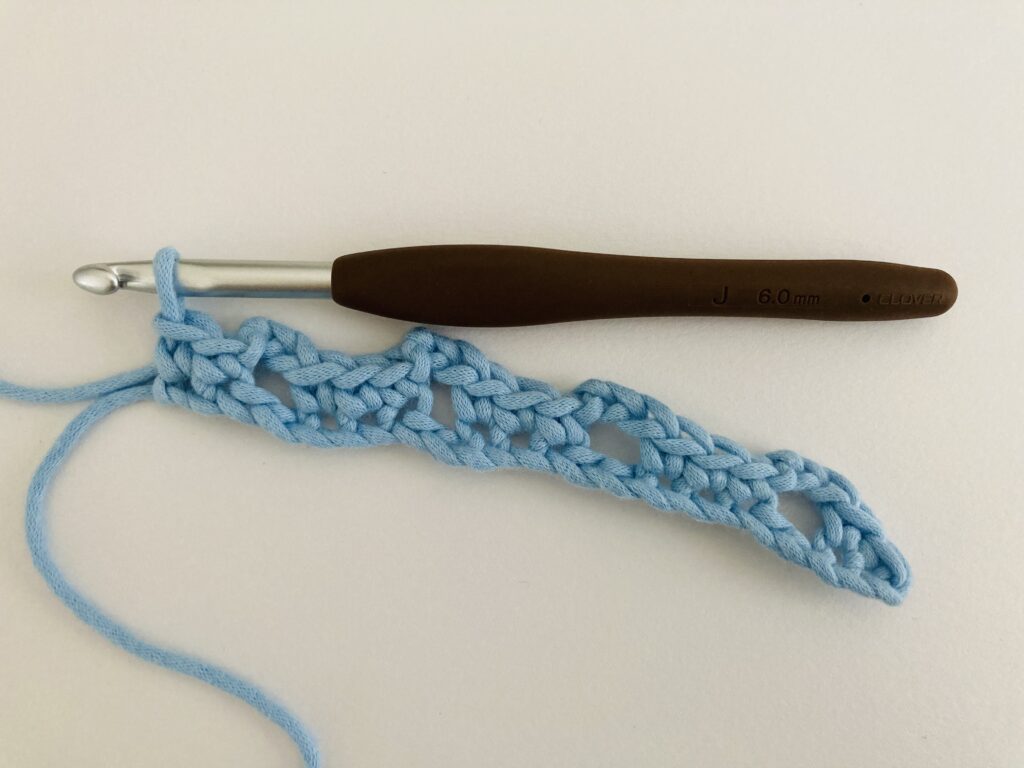
Step 6 (Turning Chain): Chain 1, turn.
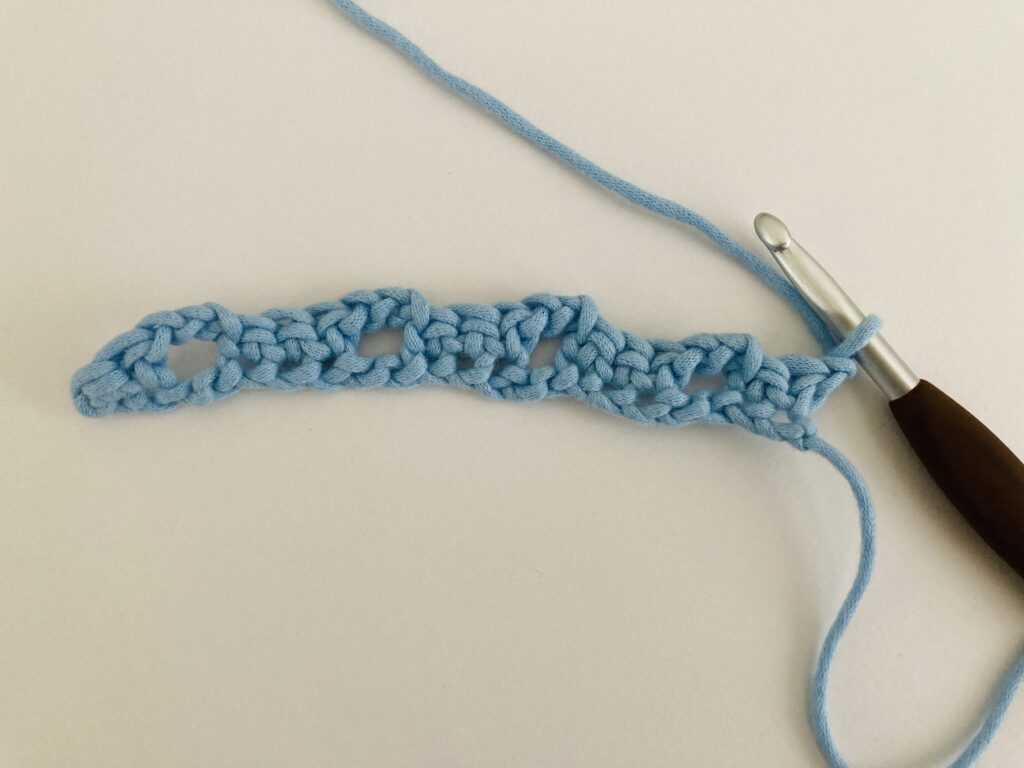
Row 2
Step 7: Single crochet in the first stitch of the row.
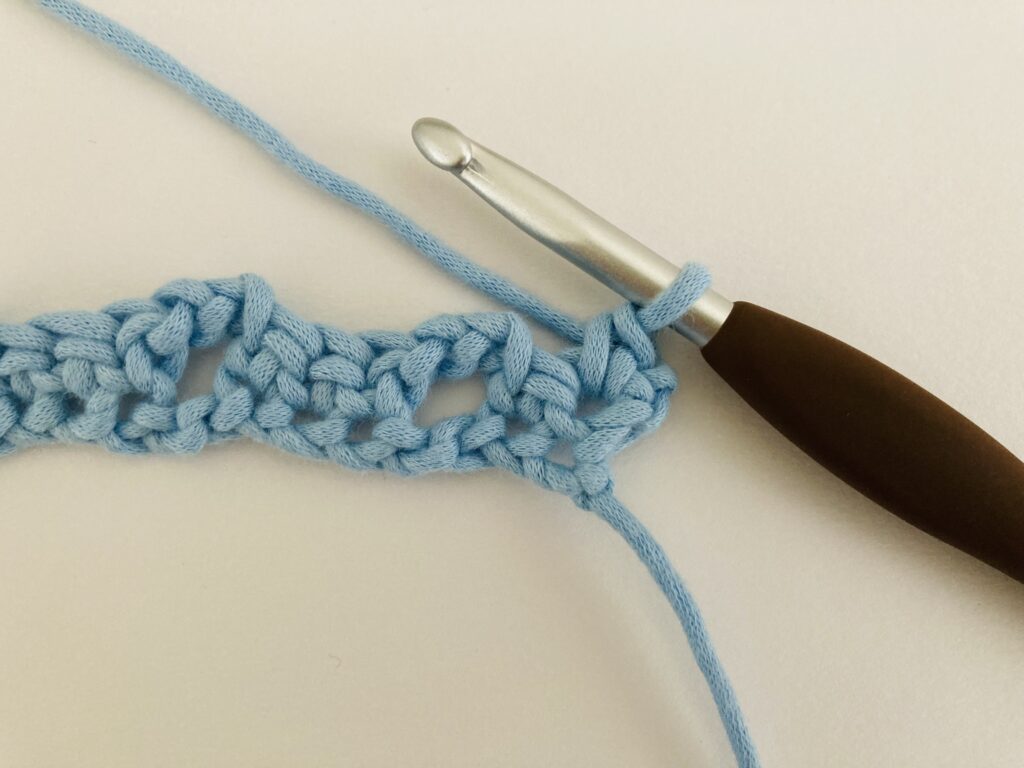
Note: We don’t count the turning chain as a stitch.
Step 8: Double crochet 5 stitches in the chain space of chain 3 from the previous row.
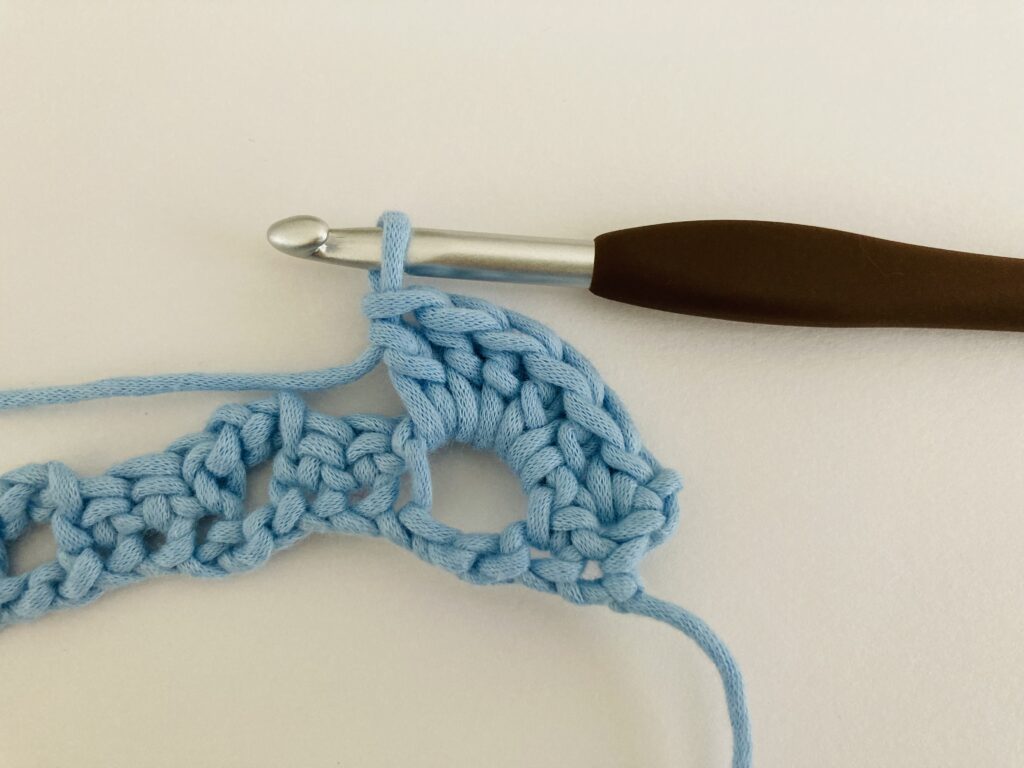
Anatomy of The Center of Single Crochet Group
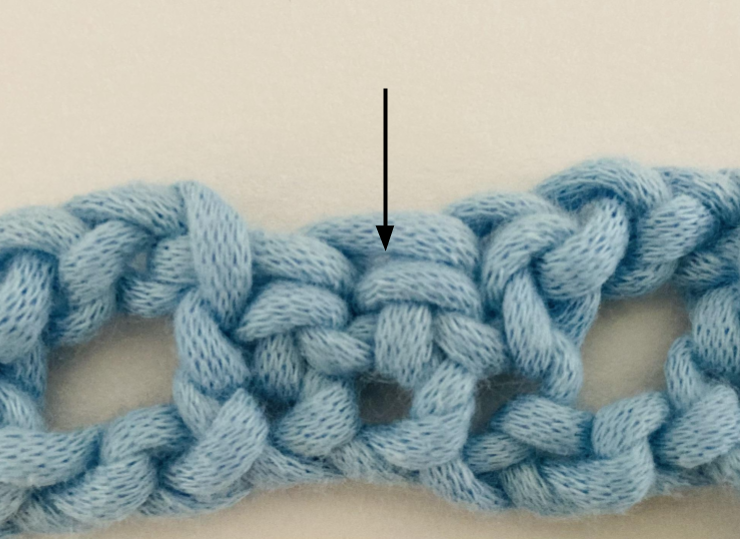
The above image shows you which stitch you have to crochet into of the single crochet group of three single crochet stitches from the previous row. I have called this step “Single Crochet Center Stitch” throughout this tutorial. If a row number has those rows following it, it means that you have to single crochet into the stitch shown above.
Step 9 (Single Crochet Center Stitch): Skip the stitch right after the chain space, and sc in the next stitch.
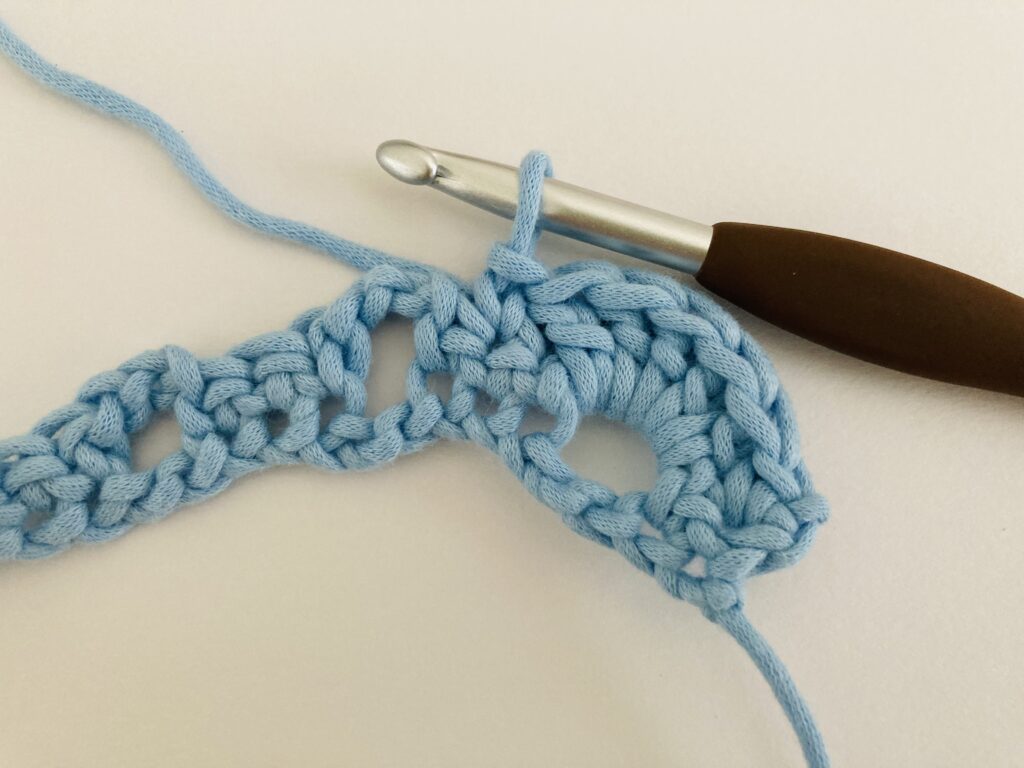
This means you will place a single crochet in the center stitch of those three single crochet from the previous row.
Step 10: Repeat steps 8 and 9 until you reach the end of the row. When you reach the last chain space of the row, only work step 8 and then continue to Step 11.
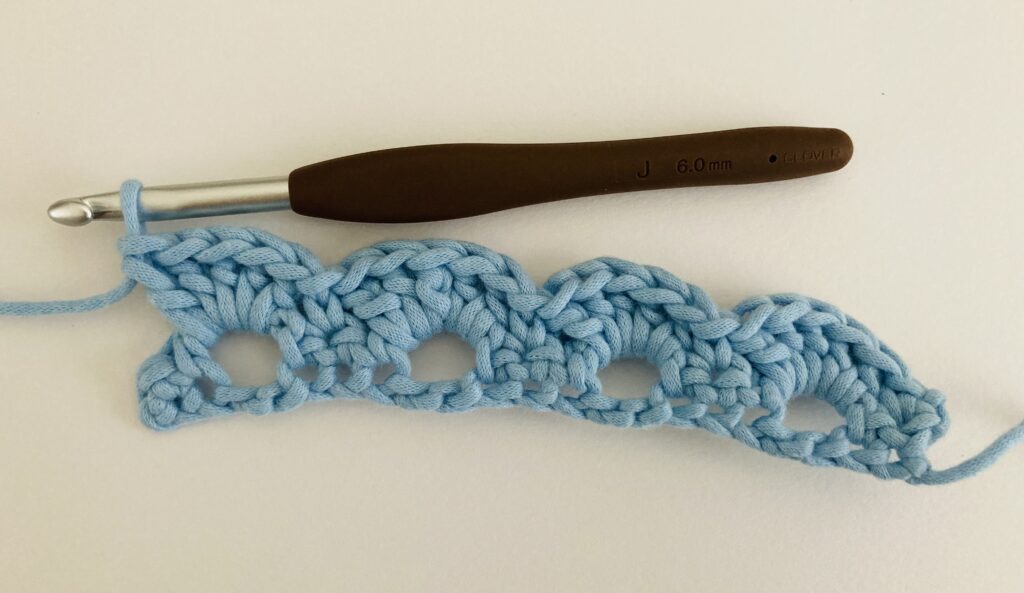
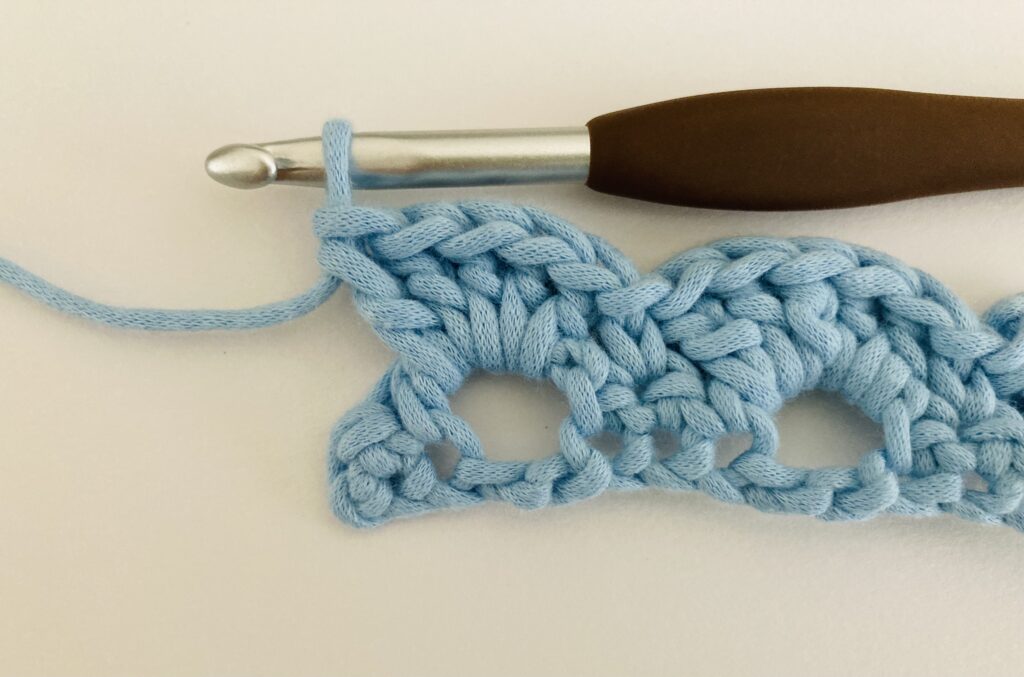
Step 11: Single crochet into the last stitch of the row.
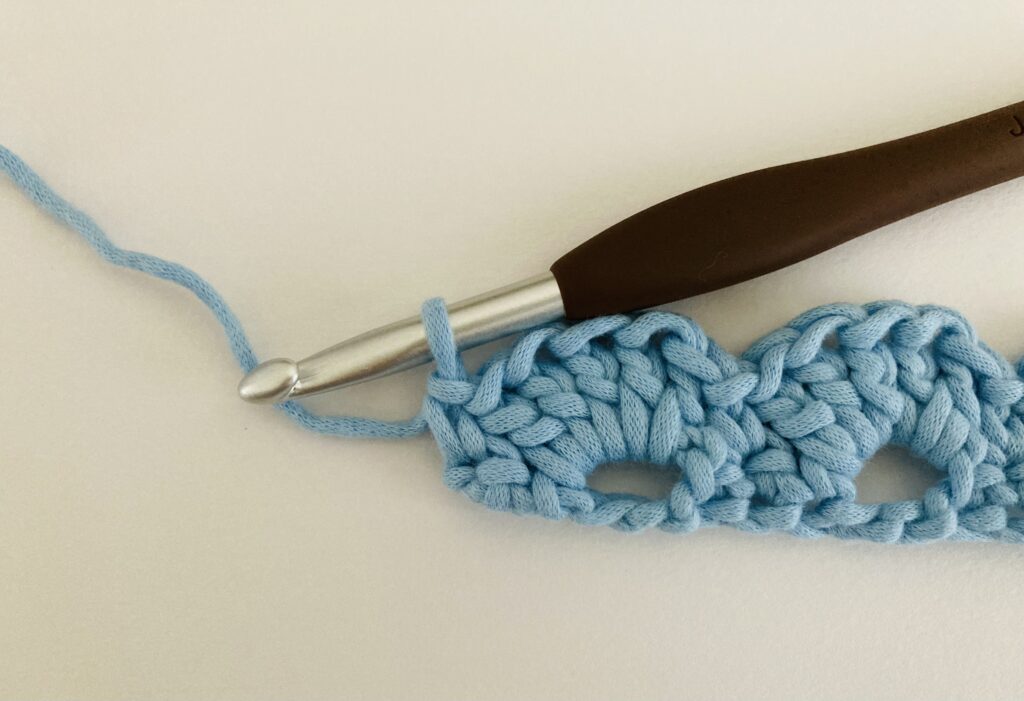
Step 12 (Turning Chain): Chain 3 and turn.
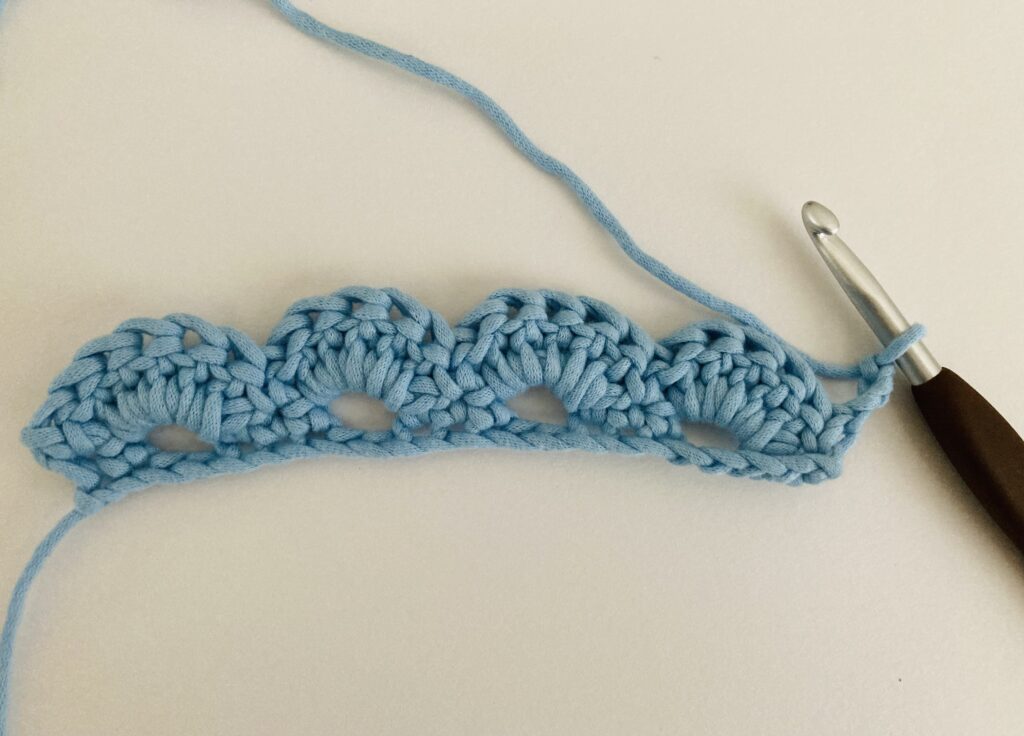
Row 3
Anatomy of Three Center Stitches of an Arch
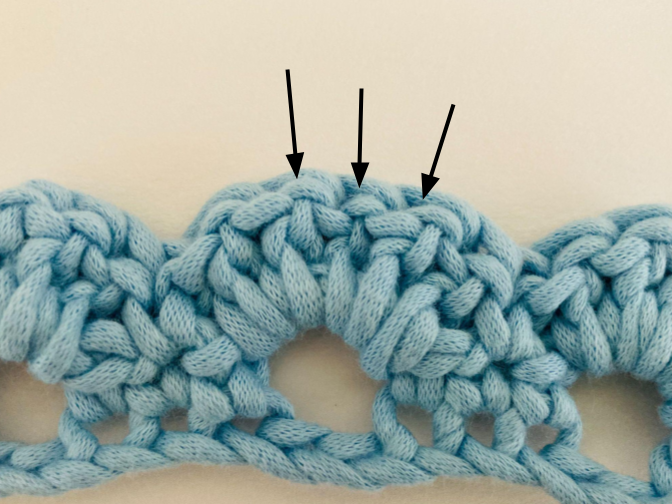
The above image shows you the three stitches that we are concerned with whenever we have to single crochet into the top of an arch from the previous row. I have denoted this process with the name “Arcade Center Stitch”, which you will find written after some of the row numbers in this pattern.
Step 13 (Arcade Center Stitch): Using the above analysis of the anatomy of the arcade stitch, single crochet in the center three stitches of the arcade stitch from the previous row. This means you will be crocheting into the 2nd, 3rd, and 4th stitch in the center of the 5 double crochet stitches you made for each arch.
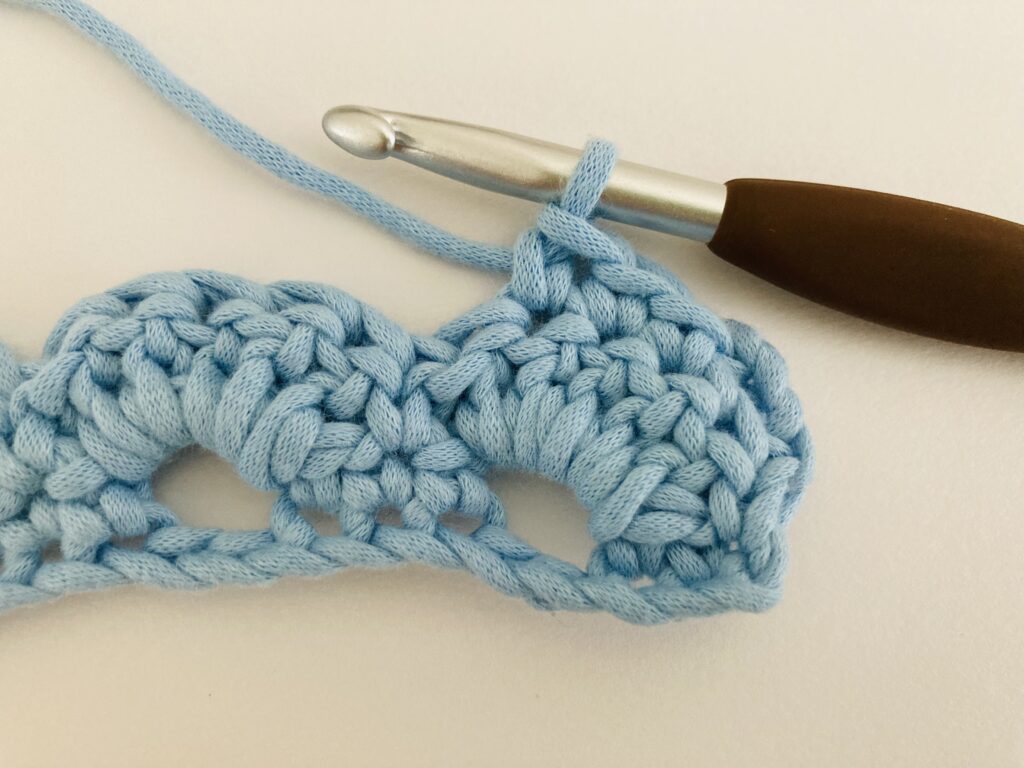
Step 14: Chain 3, skip three stitches, and do Step 13.
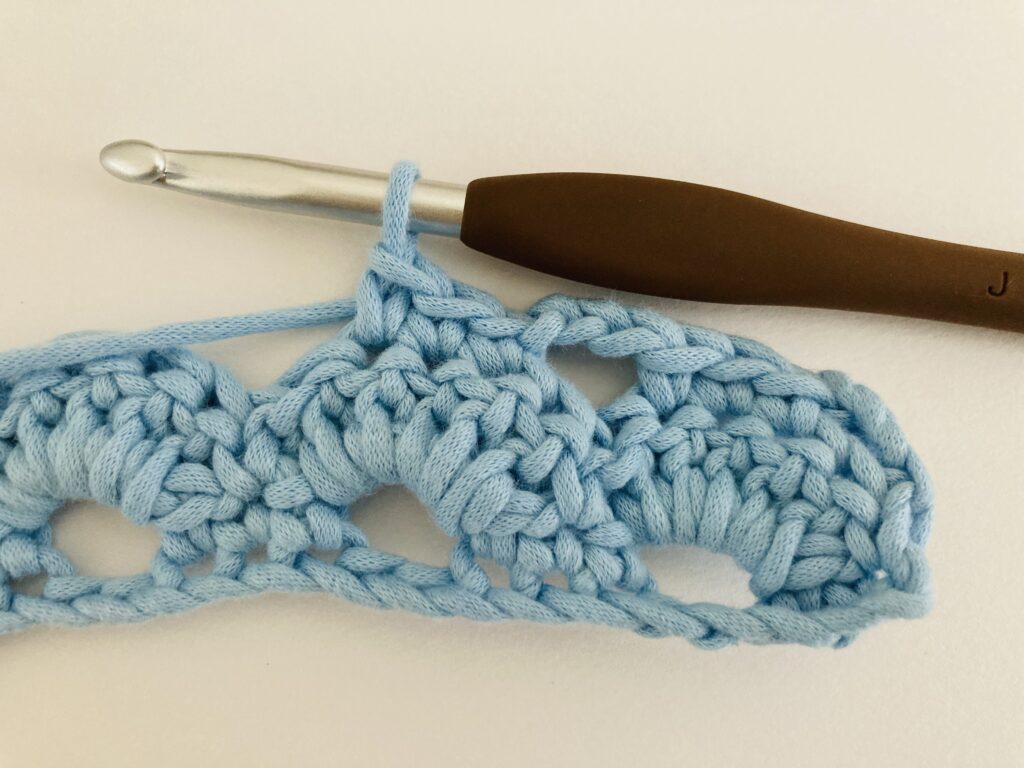
Step 15: Continue working Step 14 until you single crochet into the three center stitches in the last arcade stitch of the row.
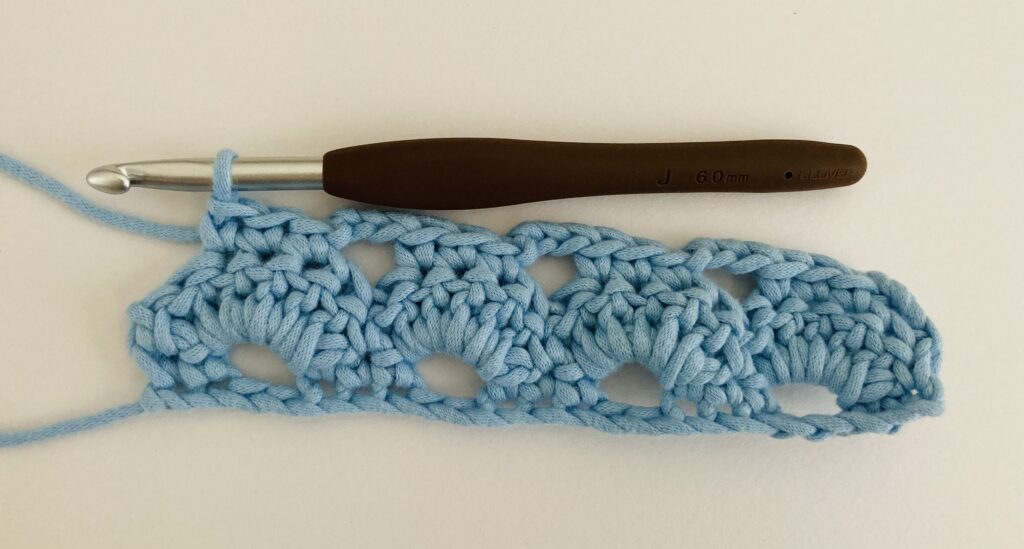
Step 16: Chain 1, half double crochet in the last stitch of the row (which is a single crochet from the previous row).
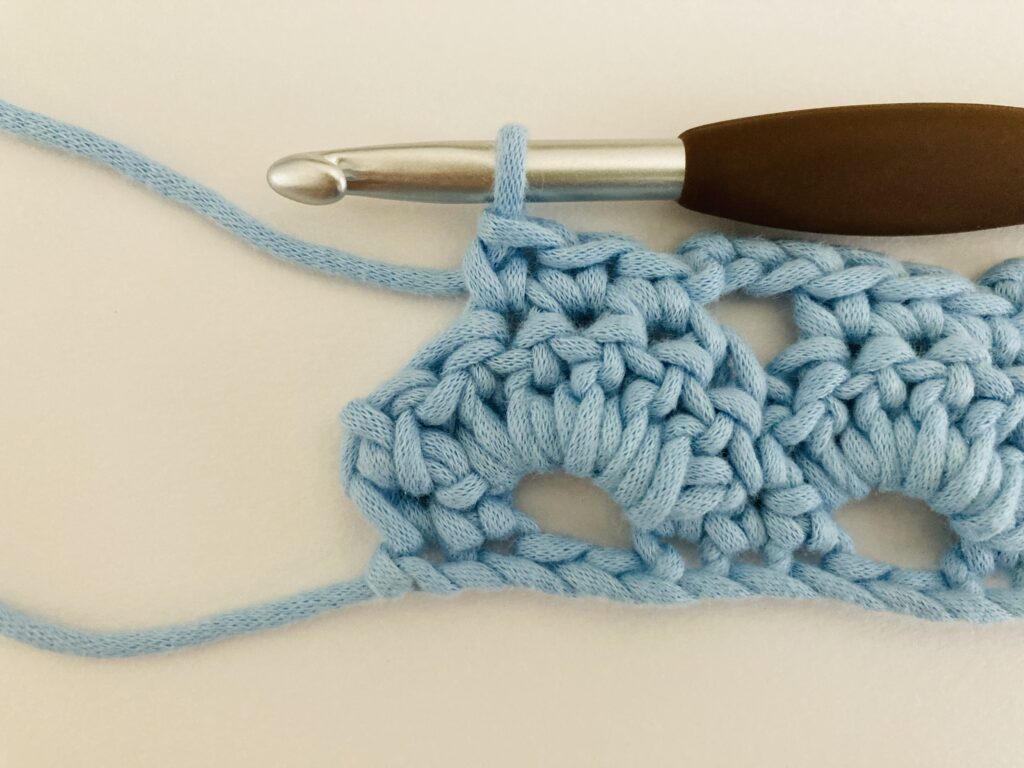
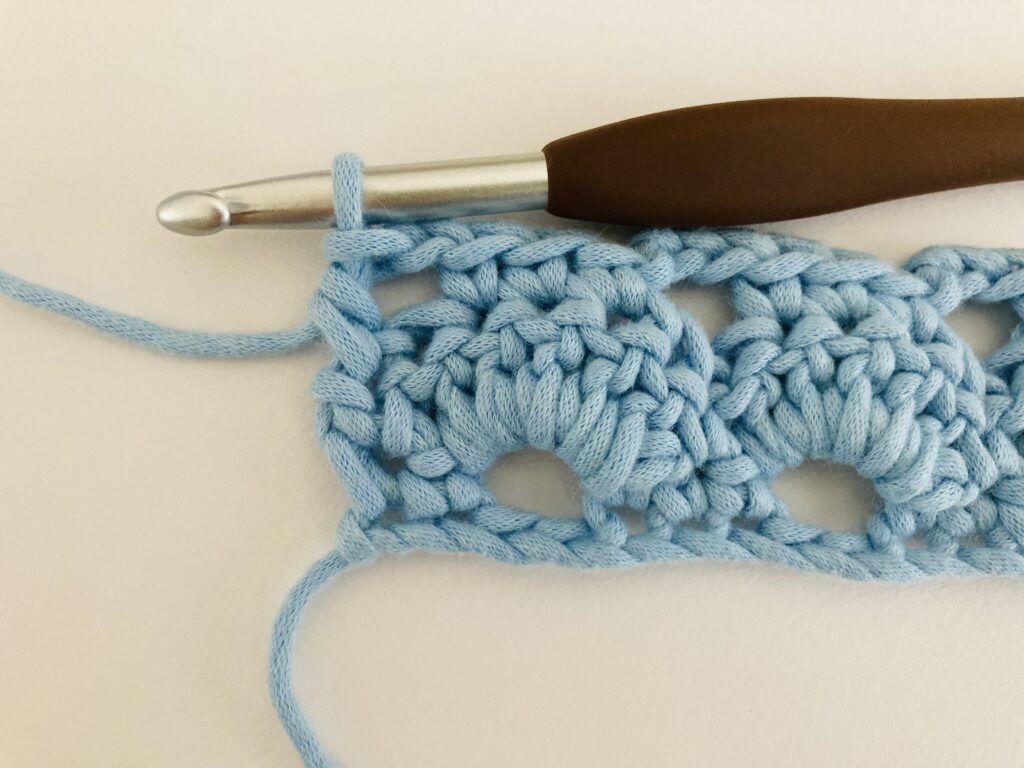
Step 17 (Turning Chain): Chain 3 and turn.
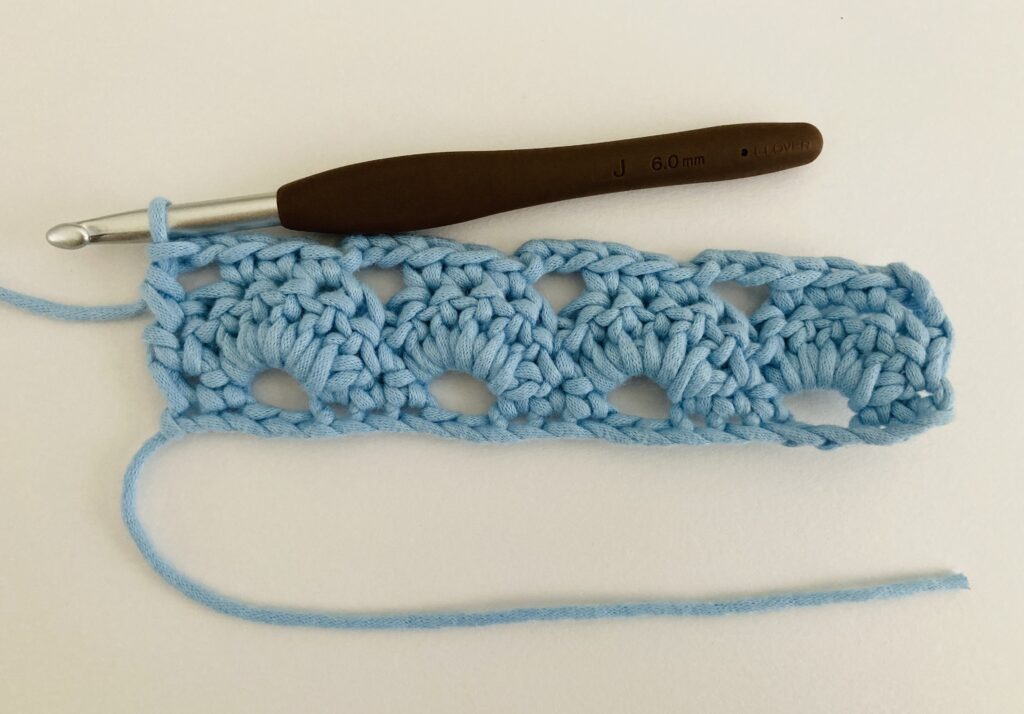
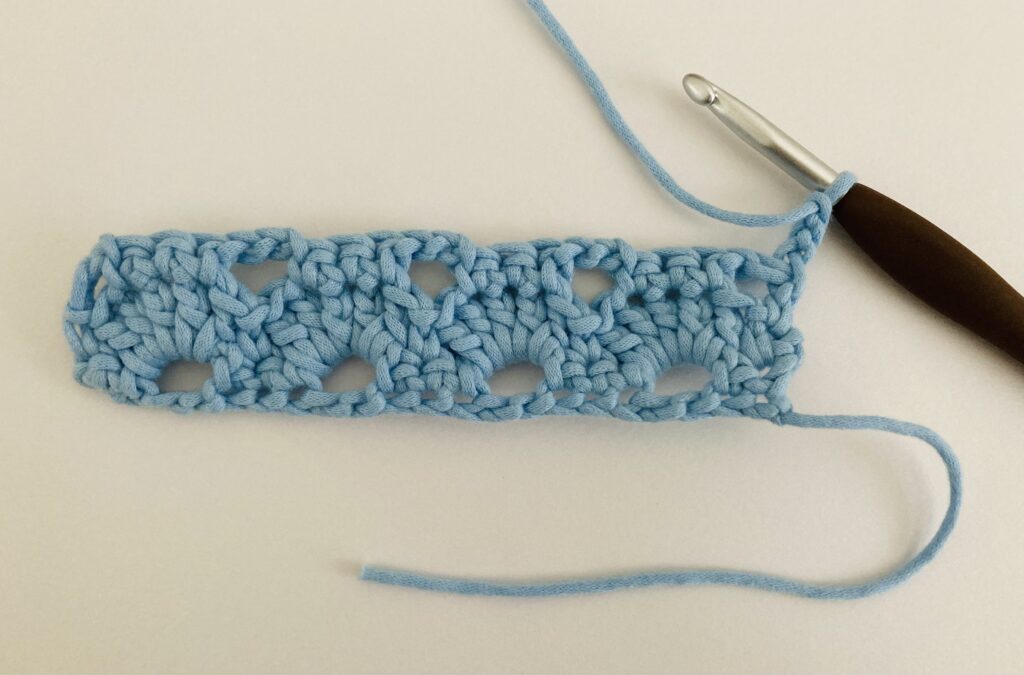
Row 4
Step 18: Double crochet two in the chain space from the previous row.
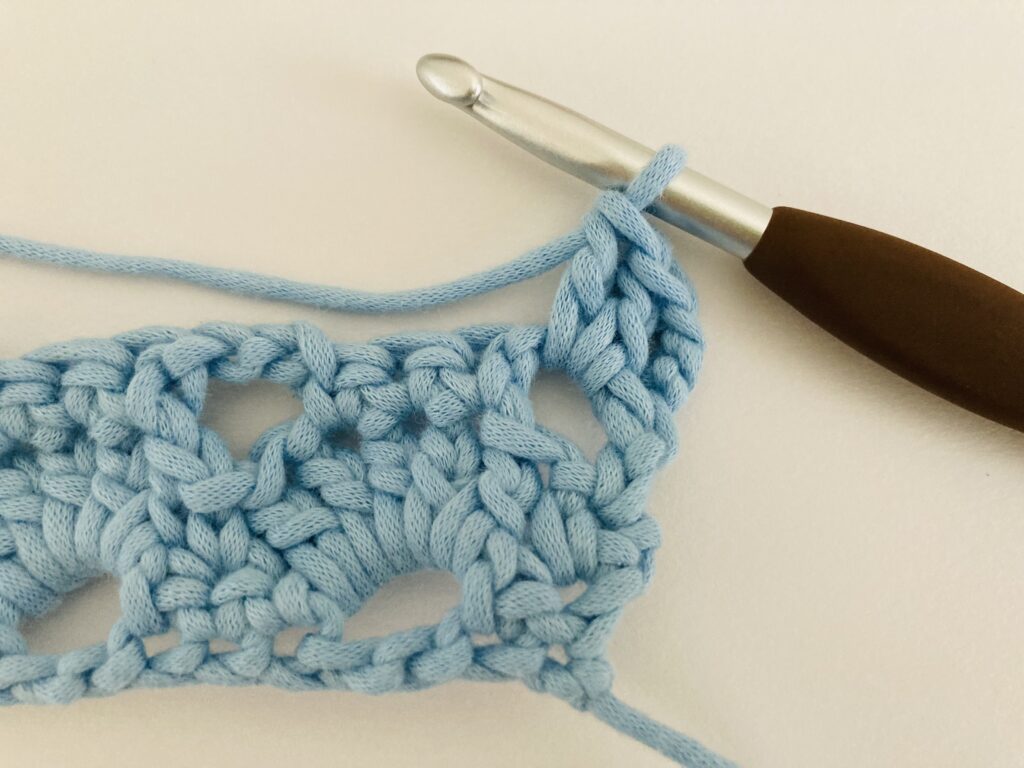
Step 19 (Center Stitch): Single crochet in the center stitch of the 3 single crochet from the previous row. This means you skip one stitch and single crochet in the next stitch.
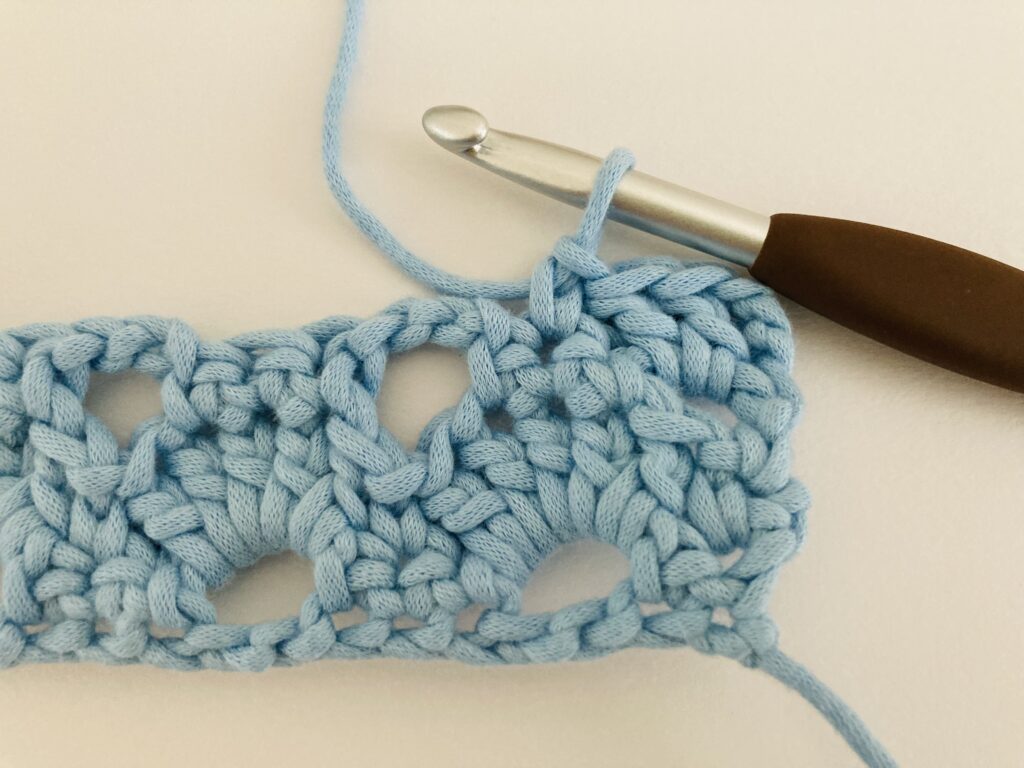
Step 20: Double crochet 5 stitches in the chain 3 space from the previous row.
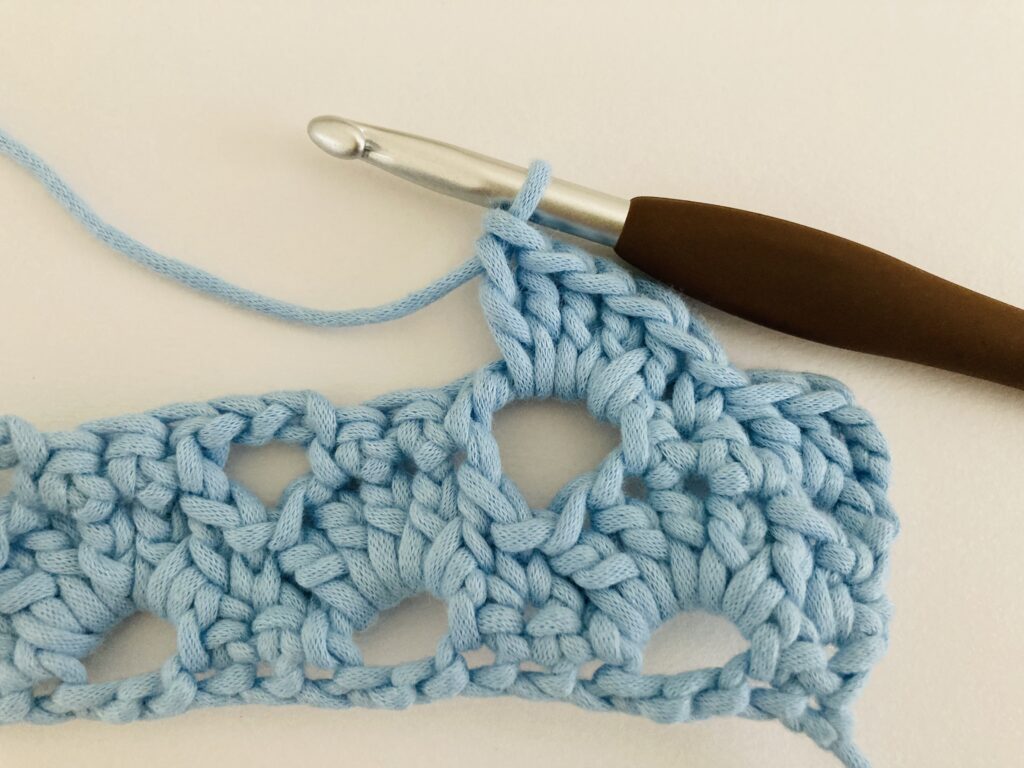
Step 21: Repeat steps 19 and 20 until you reach the end of the row after making a single crochet in the last 3 single crochet stitch group at the end of the row.
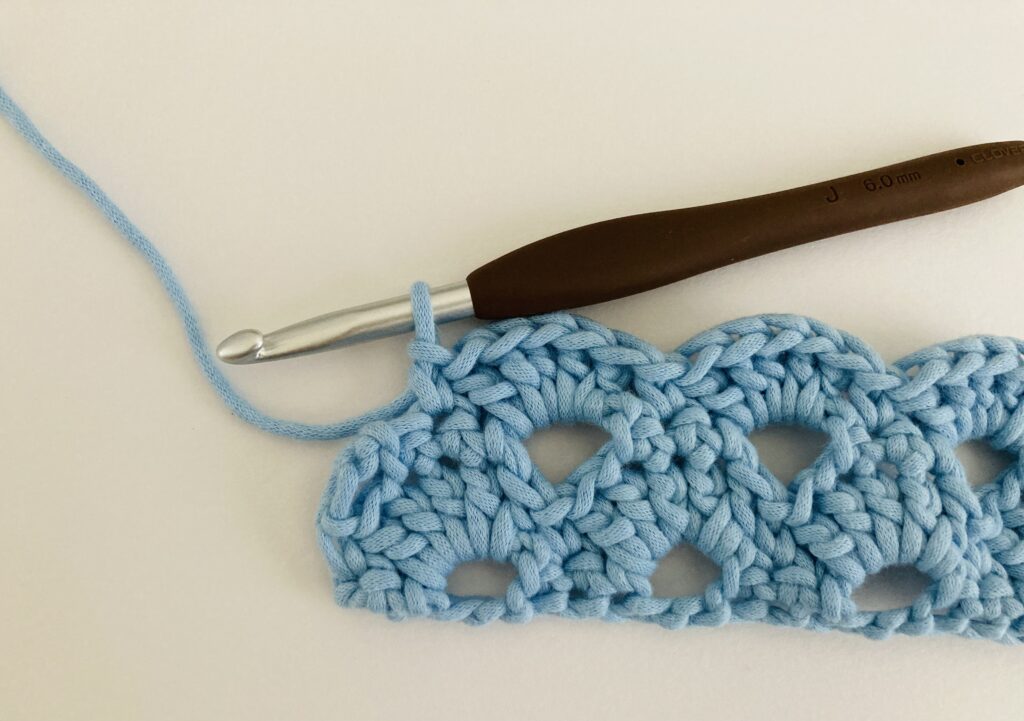
Step 22: Double crochet 3 stitches in the turning chain from the row below.
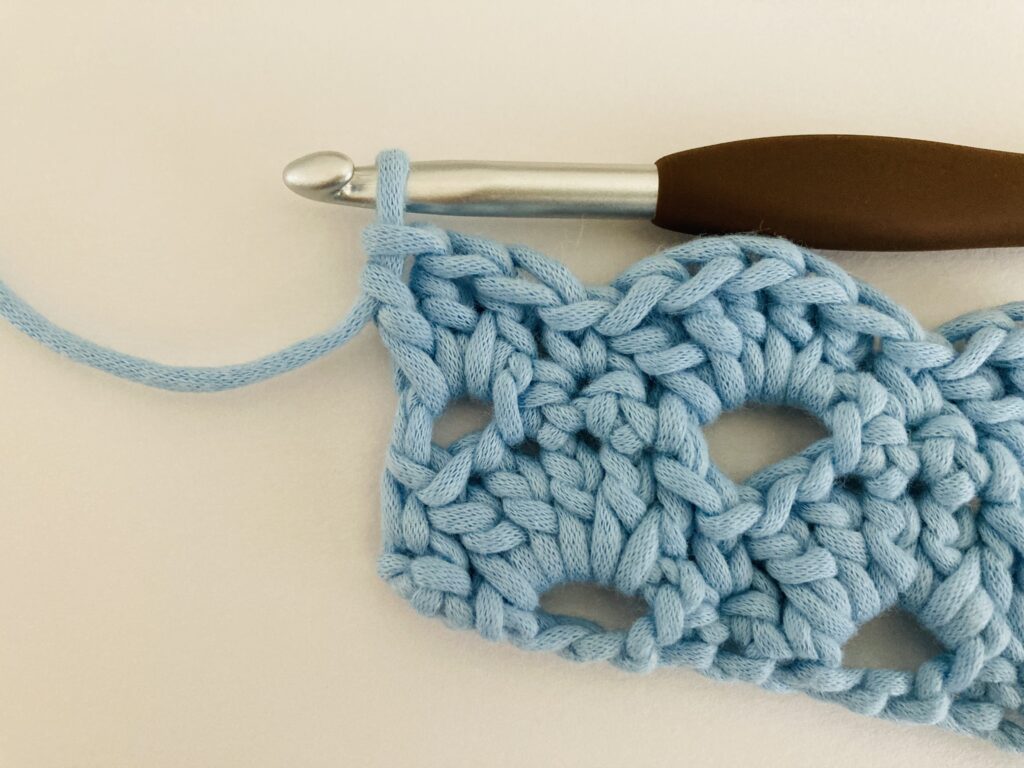
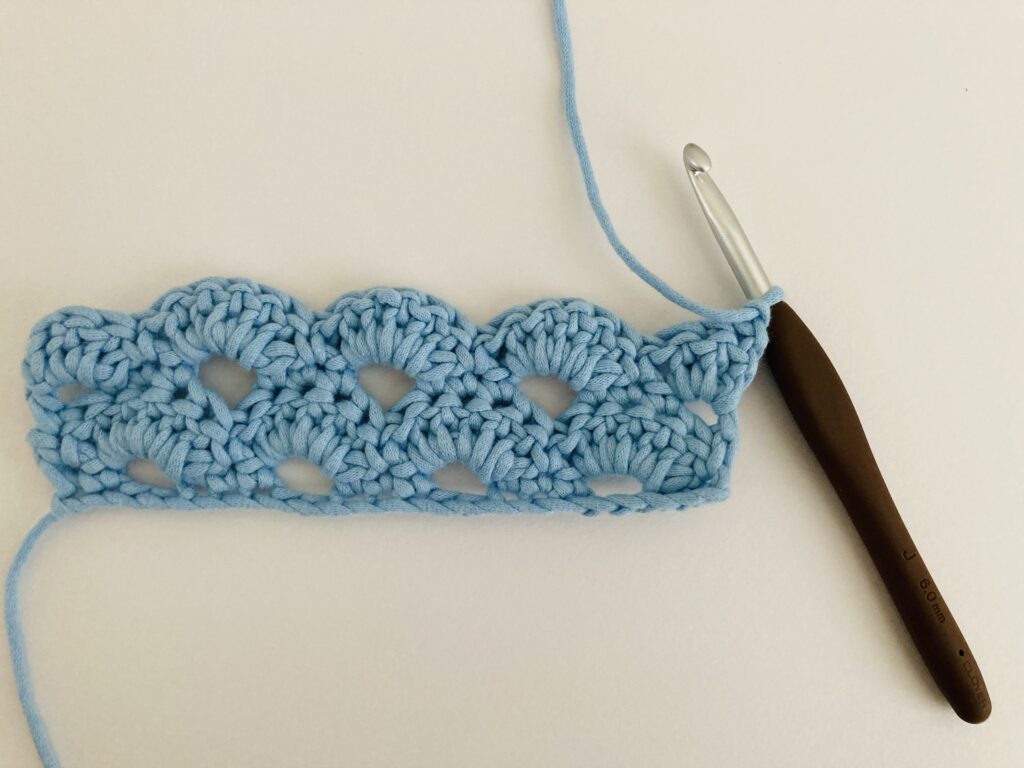
Step 23 (Turning Chain): Chain 1 and turn.
Row 5
Step 24: Single crochet in the first two stitches.
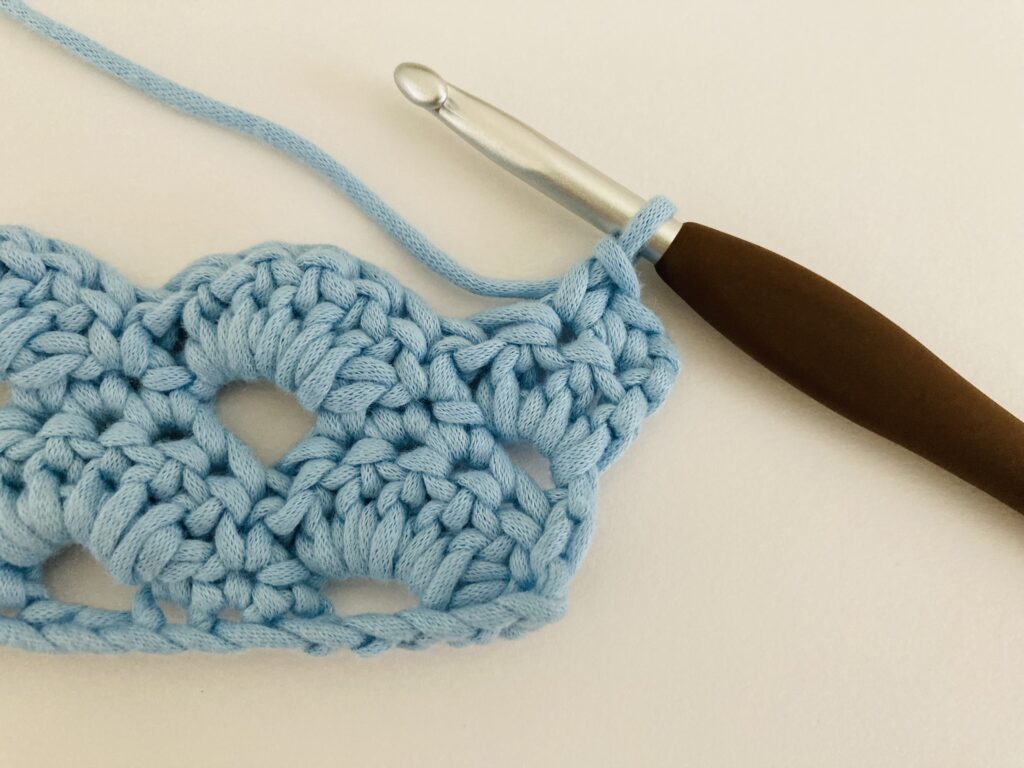
Note: We don’t count the chain as a stitch.
Step 25 (Arcade Center Stitch): Chain 3, skip 3 stitches, and single crochet in the center three stitches of the arcade stitch from the previous row. Stop when you have chained 3 and are at the last two stitches of the row.
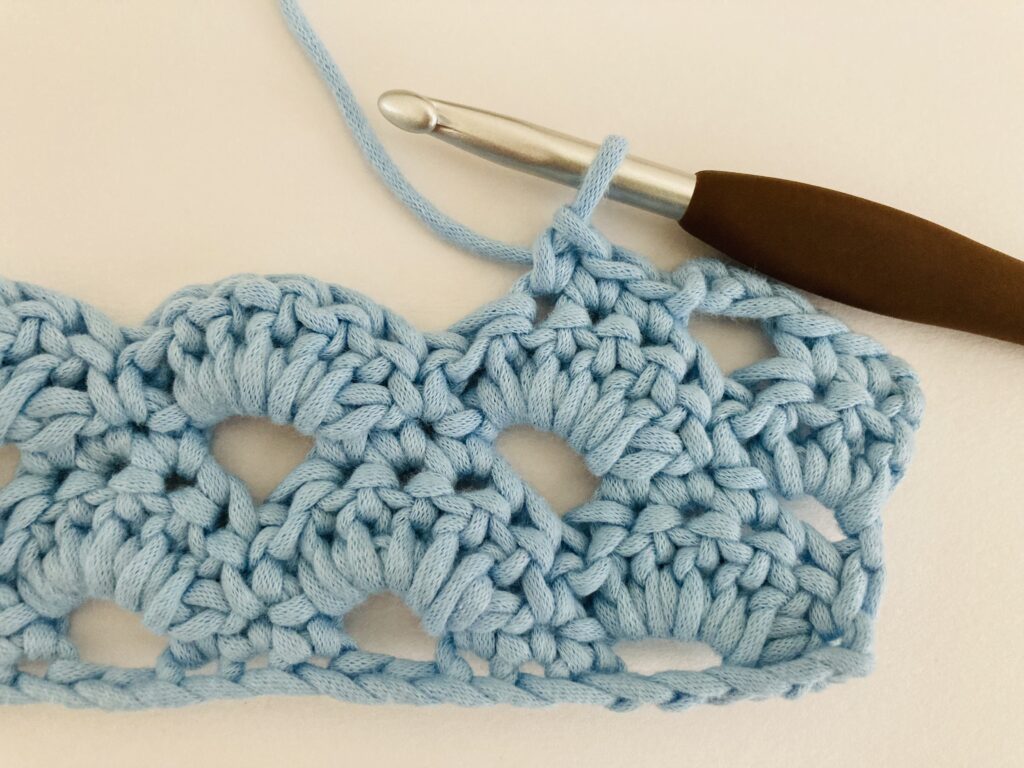
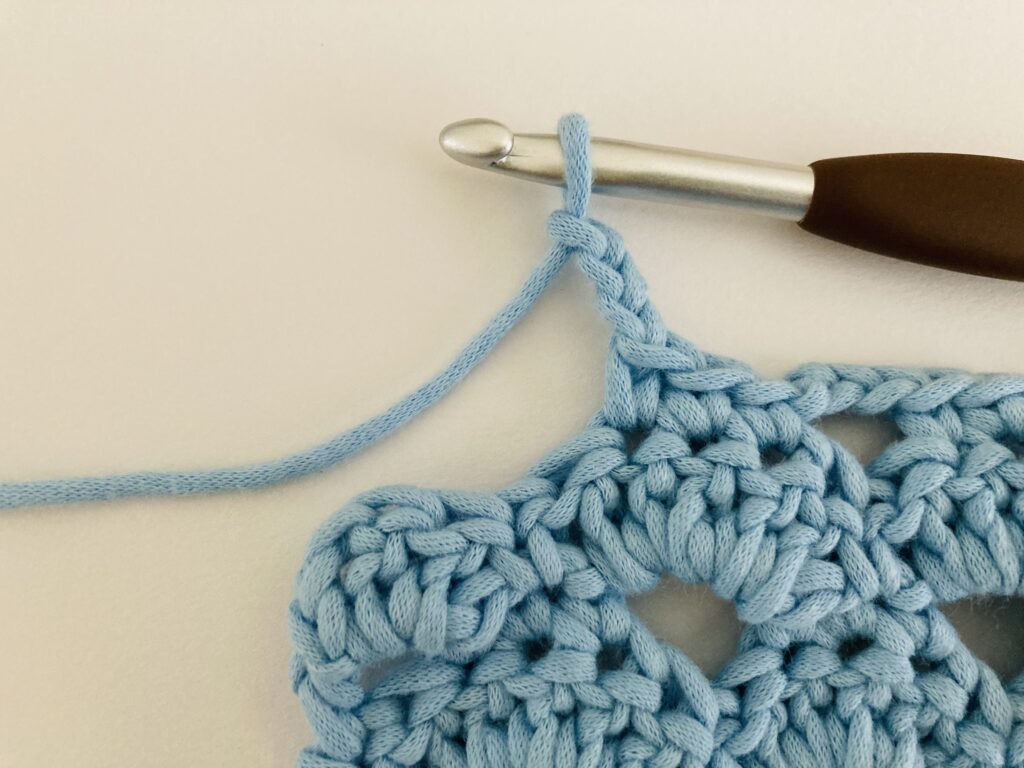
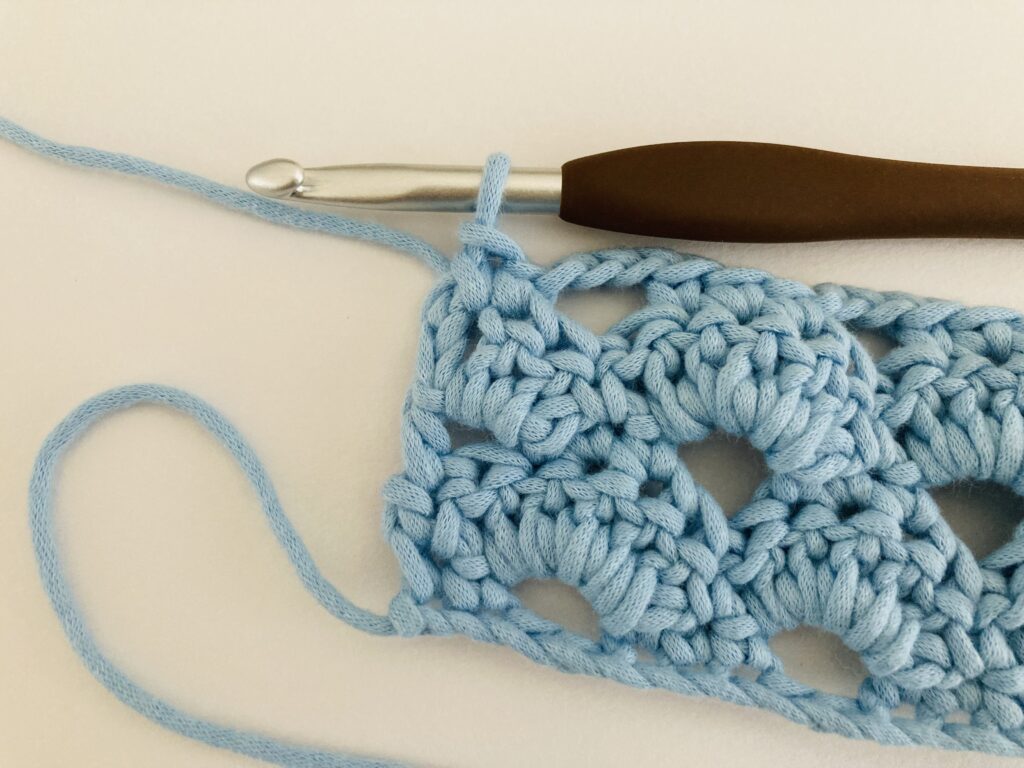
Step 26: Single crochet 1 stitch in the last double crochet and in the turning chain from the row below.
Row 6 – Infinity
For the rows that are crocheted after row 5, you repeat rows 2 through 5 above again and again, until you reach the desired height for your crochet project. This is what makes this stitch pattern have a four row repeat.
Conclusion
I hope this stitch tutorial helped to demystify the process needed to crochet the Arcade / Wheatsheaf Stitch. I don’t think I’ve published a stitch tutorial that has a four row repeat on this blog yet. Due to this stitch pattern’s four row repeat, it may take longer to memorize what to crochet next for each row, but I’m excited to see how you plan on using this stitch in your projects. You’ll get some intuition on how to proceed in the stitch pattern for the next rows if you repeatedly work more rows in this stitch pattern. If you liked this tutorial and want to share how you used the Arcade / Wheatsheaf Stitch in your crochet projects, let me know in the comments down below! Happy Crocheting!

Leave a Reply