If you want to add another quick and easy crochet stitch to your skillset, you clicked on the right post! I’m going to be speaking about how to crochet a fundamental stitch called a half double crochet, which is taller than a single crochet stitch and shorter than a double crochet stitch. A half double crochet is a great stitch to learn when learning how to crochet, as it isn’t as airy and holey as a double crochet stitch, and it isn’t as closely ‘knit’ as a single crochet stitch. The half double crochet stitch strikes a balance between these two stitches in terms of its structure, as it is a little tight knit, while still being slightly airy. Due to these properties, the half double crochet stitch is a joy to work up quickly on both large and small crochet projects.
Can you make a half double crochet chainless foundation?
Absolutely! One of the advantages of learning this stitch with a regular chain is also the fact that it will give you the ability to recall the steps needed to make a chainless half double crochet foundation.
To clarify what a half double crochet chainless foundation is, it is basically a way to create the chain base of a stitch and the stitch itself, before proceeding to make the next chain stitch and another stitch on top of that one. On the other hand, a regular chain entails you make every single chain stitch you need, and then in the next row, you make stitches on top of the regular chain.
As mentioned in the How to Make a Chain blog post, a chainless foundation stitch is great if you are looking for a way to create a stretchy base for your project. This will come in handy when you want to create a seamless look to your crochet projects. This is because a foundation chain, whether it is a half double crochet foundation chain, a double crochet foundation chain, or a single crochet foundation chain, gives you the benefit of creating a row at the beginning of your project that can be crocheted into at both the top and bottom. This is because there are v-shaped stitches that are on both the top and bottom of the first row that can be crocheted into, unlike a regular chain.
Although foundation crochet stitches are an exciting topic to learn about, I decided to write this blog post about the fundamental half double crochet stitch with a regular chain, which will help you jumpstart your journey on creating a foundation half double crochet, if you wish to do so in the future. I will hopefully write a post about foundation half double crochet in the future, but for now, let’s demystify how to create a half double crochet stitch using a regular chain.
Materials
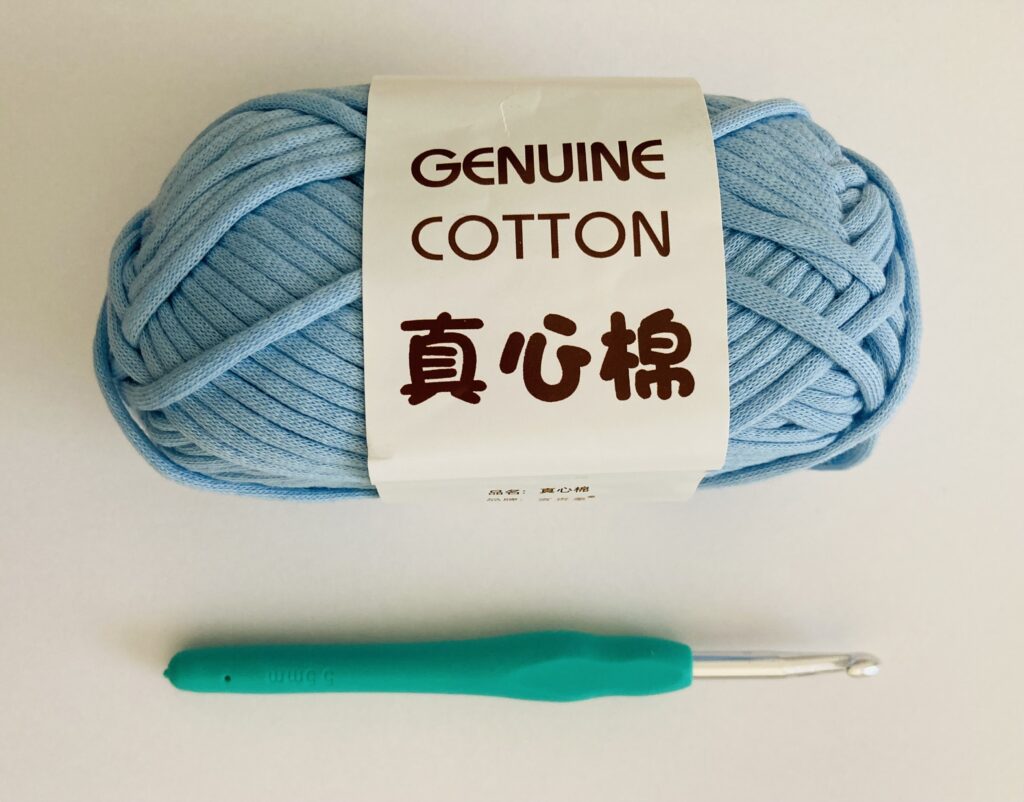
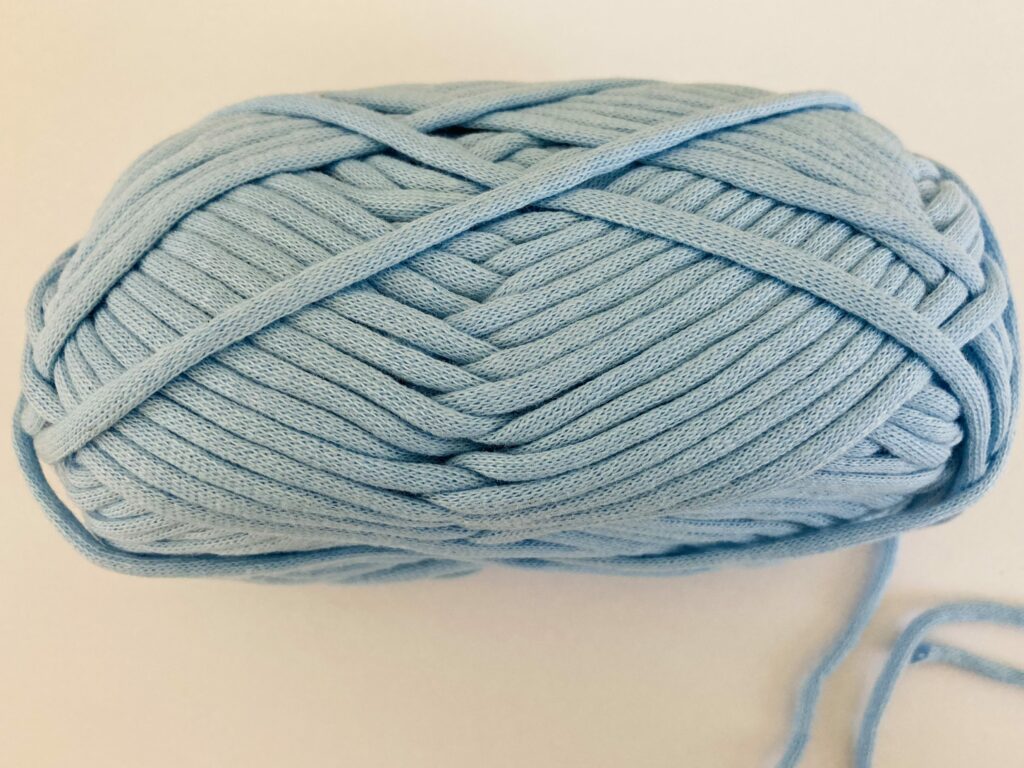
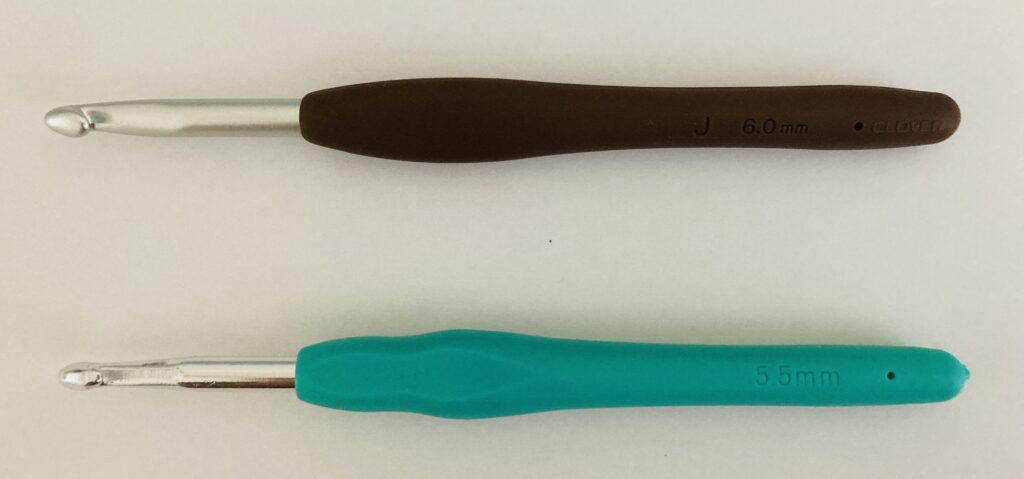
For this tutorial, I decided to use a 6.0mm Clover Hook and a 5.5mm hook. I bought the yarn and the teal hook from Temu. It’s also important to mention that I used a chainette yarn to crochet in this tutorial. Due to the fact that a chainette yarn is knitted as a tube, it is easier to see stitches that are made in a chainette yarn. This also means that this type of yarn will not split, and will stay more or less intact when you frog or rip out stitches that you have already crocheted. I highly recommend trying out Clover Crochet Hooks! They’re made in Japan and glide through yarn like butter, making the experience of crocheting much more seamless, and frustration free. Temu also sells some great crochet tools, such as the crochet hook and yarn ball I’ve shown in the above images.
How to Do A Half Double Crochet Stitch
Step 1: Chain 20
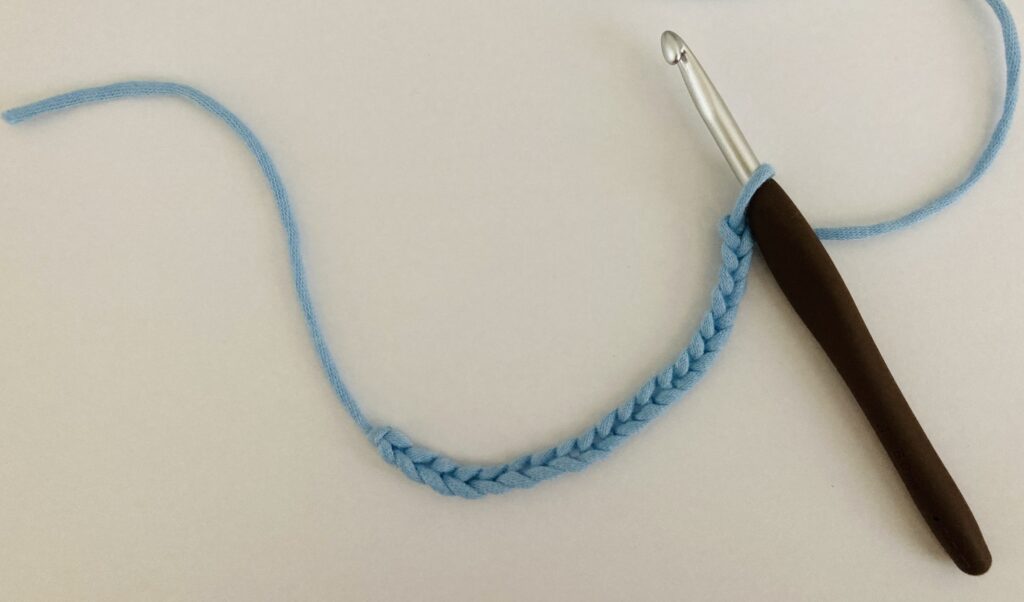
For this tutorial, I decided to chain 20 stitches. I used the 6.00 mm hook in this step, so that my work lays flat when I begin to work half double crochet stitches in each of the chains using the 5.5 mm hook in future steps. The trick to keeping your work flat is to figure out what hook size you would like to work your project in, and then use a hook size that is 0.5 to 1.00 mm larger than the project when you crochet the chain in. For example, I chose to work the chain in a 6.00 mm hook, and then when I started to work half double crochets, I used a 5.5 mm hook.
Optional Step: Swap Out the Hook for a Smaller Hook
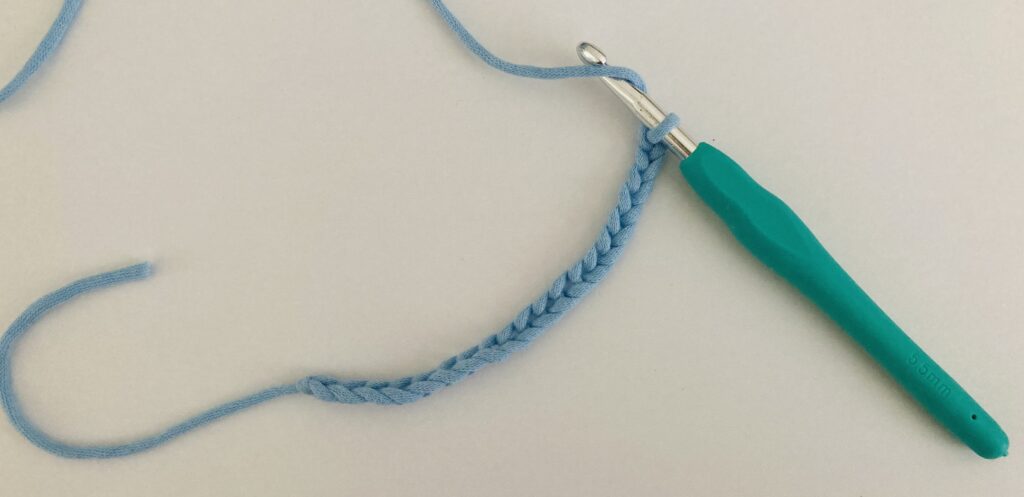
As mentioned in the previous step, you may swap out the hook for a smaller one to ensure that your work doesn’t curl, or continue to work in the same hook size you made the chain in.
Optional Step: Counting Your Stitches
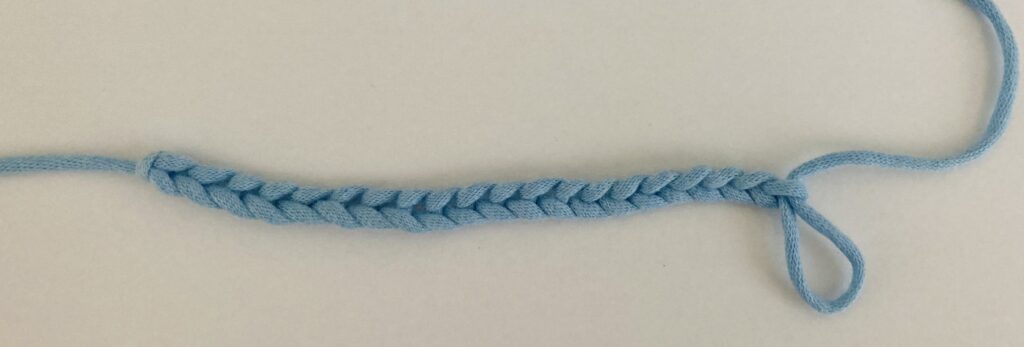
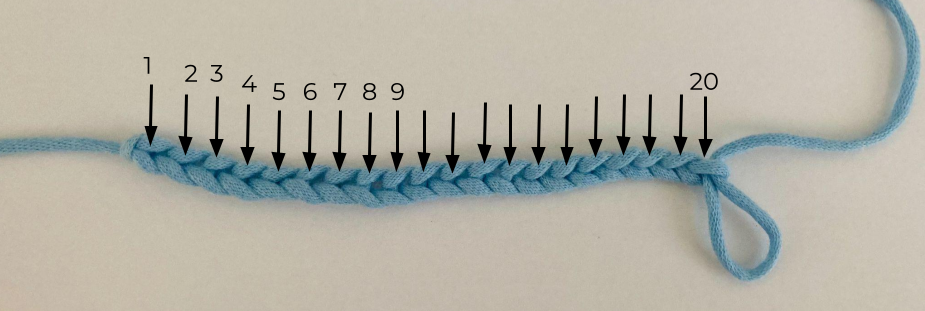
As you can see above, you can count the number of chains before moving onto the next step. When counting chains, you count them based on the number of v-shaped stitches.
Step 2: Yarn Over and Insert Hook into Third Chain from Hook
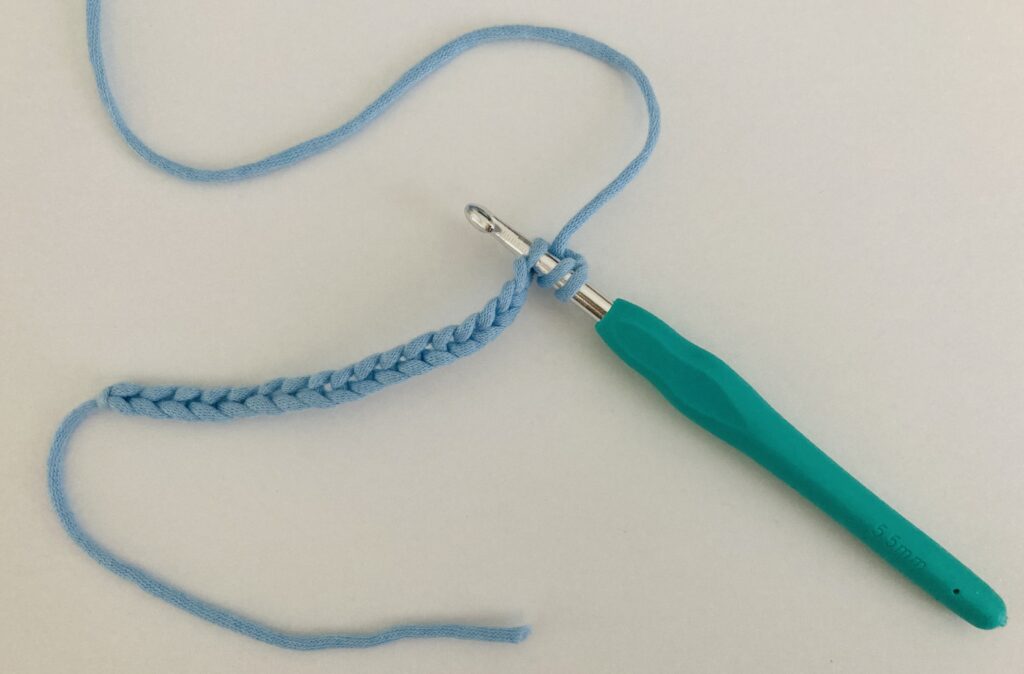
When counting a number of chains from the hook, we don’t count the loop on the hook. Instead, you can refer to the previous step and its image and count three stitches including stitch number twenty and count backwards two stitches, and insert your hook in the third stitch. This means that you would insert the hook into stitch number 18 according to the picture shown in the previous step.
Make sure that you are first yarning over once, and then inserting the hook into chain stitch number 18. The yarn over step can be seen in the above image, where there is already a loop over the hook between the current loop on your hook and the chain stitch the hook is inserted into. If you need a refresher on how to yarn over, be sure to check out the blog post about How to Crochet a Chain, as I speak about the process of yarning over in more detail in that blog post. If it still doesn’t click, you can also check out some other crocheters’ tutorials on the internet as well.
Step 3: Yarn Over Once and Pull Loop Out of Chain
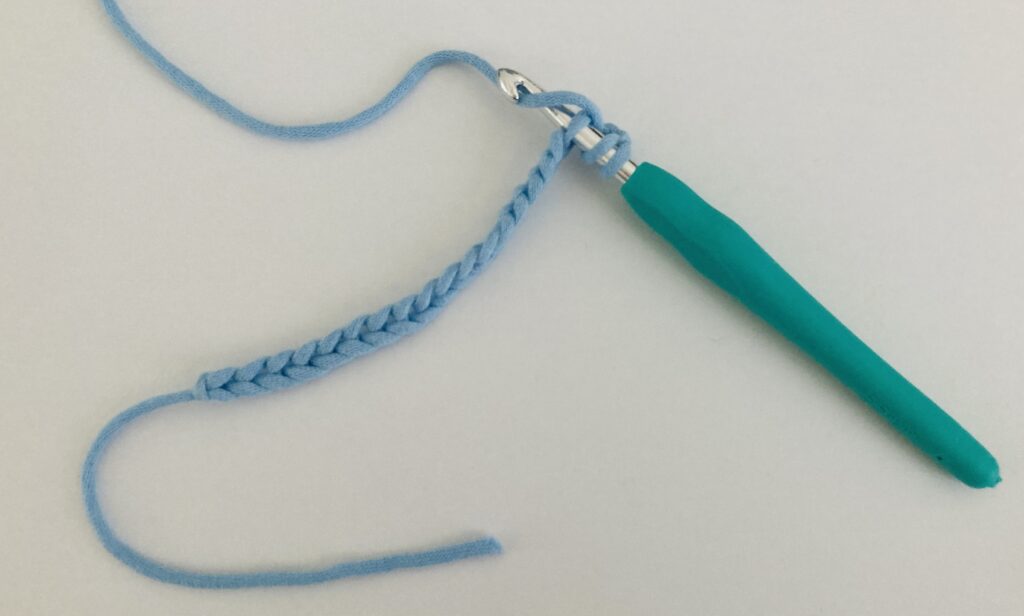
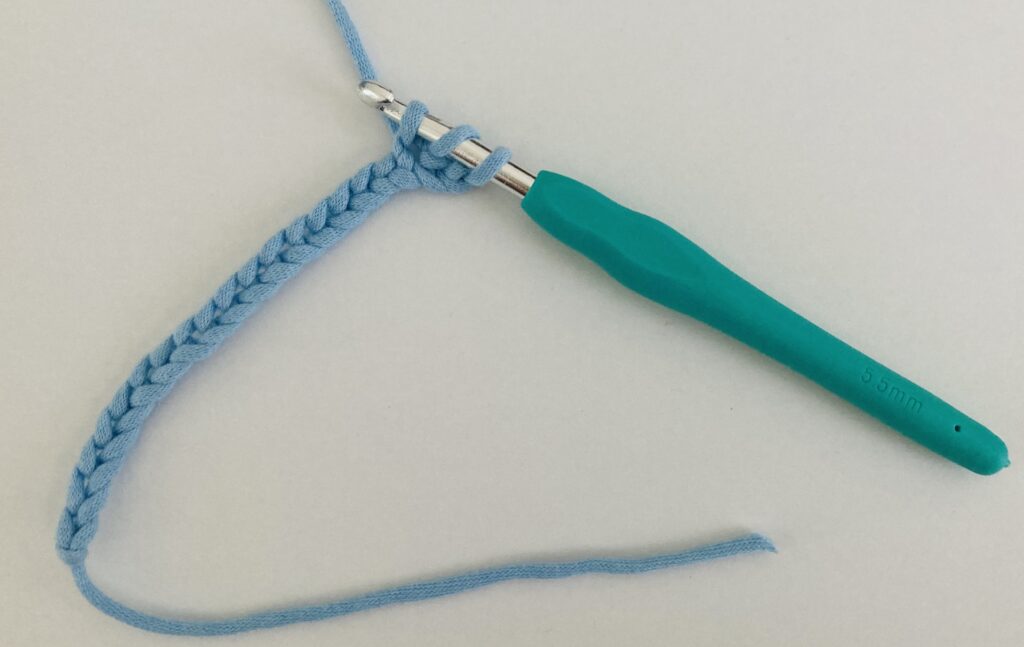
Once the hook is inserted into the chain stitch, you need to yarn over again, and pull up a loop. This is why there is another loop coming out of the chain stitch in the above image. You can get this loop by yarn-ing over and then pulling it through the chain stitch. You should now have three loops on your hook. If you don’t have three loops, make sure you yarn over once before inserting the hook into the chain stitch, yarn-ing over once after the hook has been inserted into the chain stitch, and pulling it up through the chain stitch.
Step 4: Yarn Over Once and Pull Through Three Loops
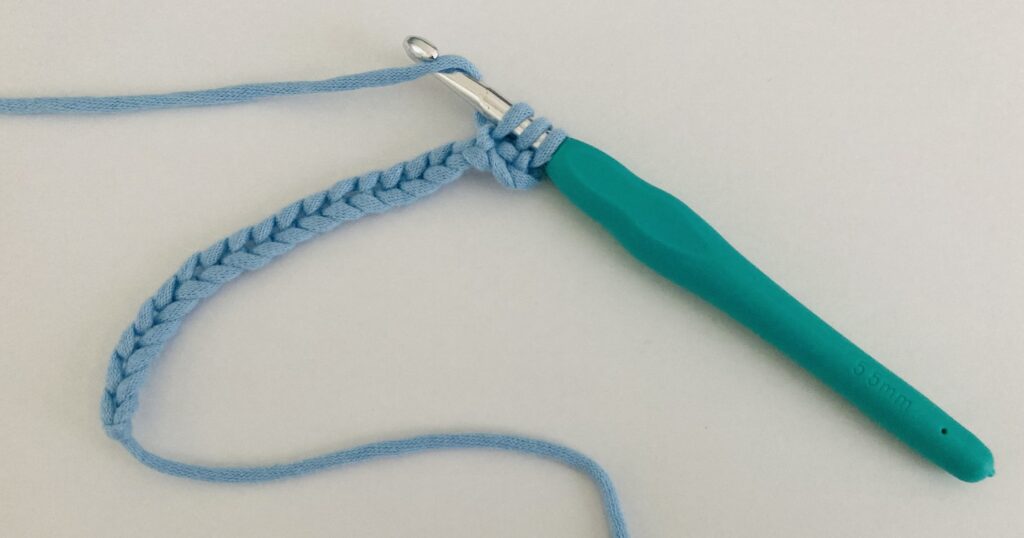
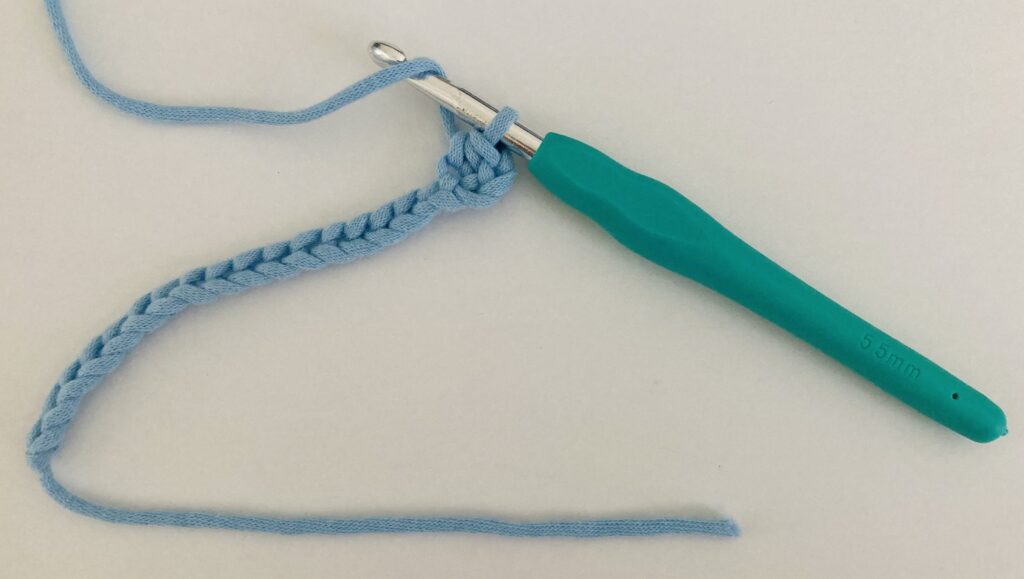
Now, you need to yarn over once more. This is the step you do before you pull the yarn you have yarn-ed over on your hook through the three loops on your hook. The image on the right shows the resulting stitch. That’s your first half double crochet stitch! How exciting!
Step 5 – Infinity: Repeat the Process as Many Times Needed

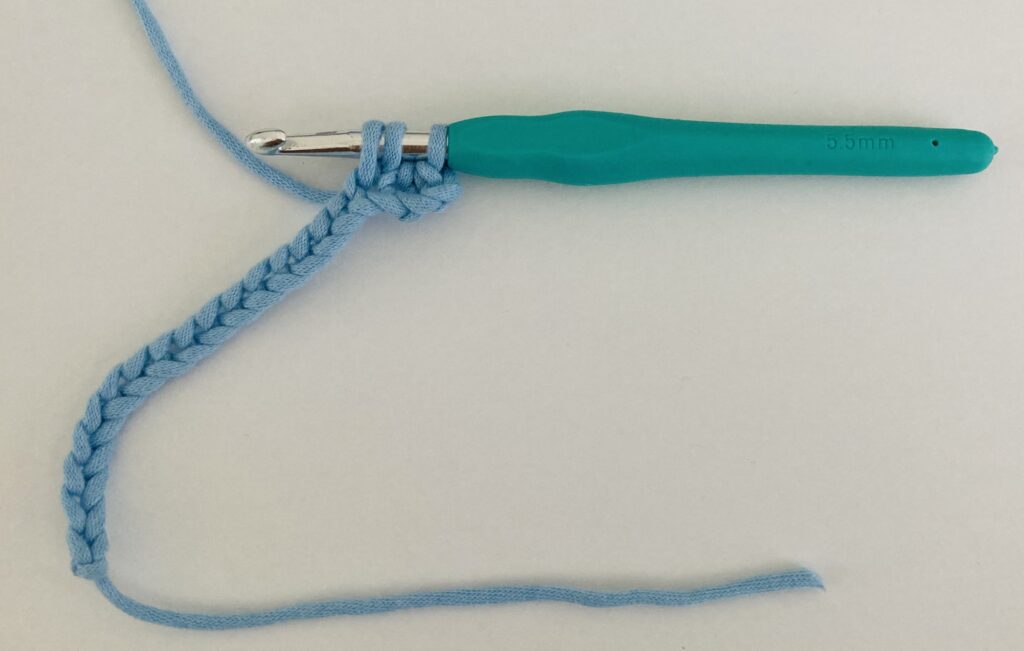
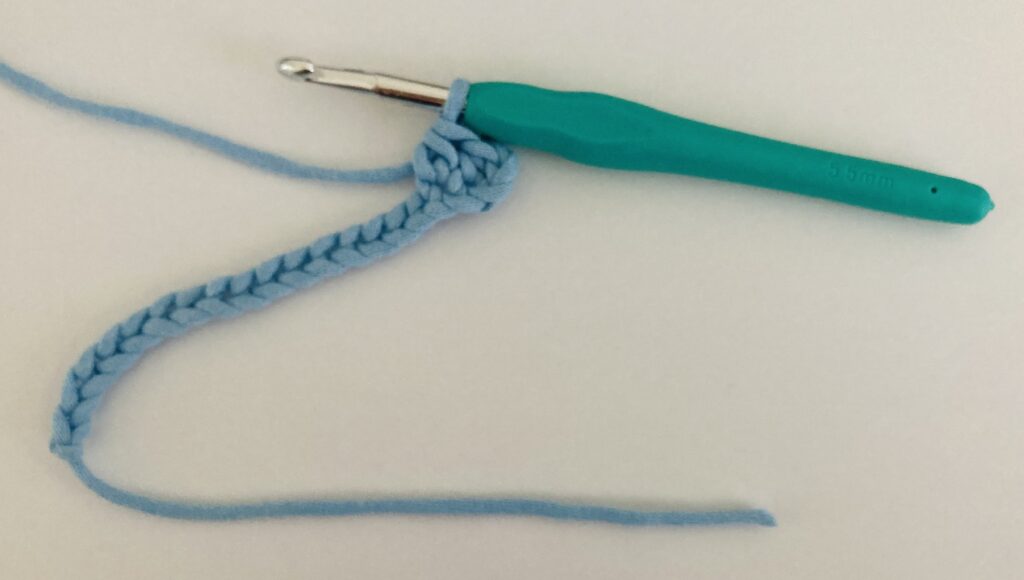
Now, you can repeat the process as many times as needed across the row to make as many half double crochet stitches as needed.
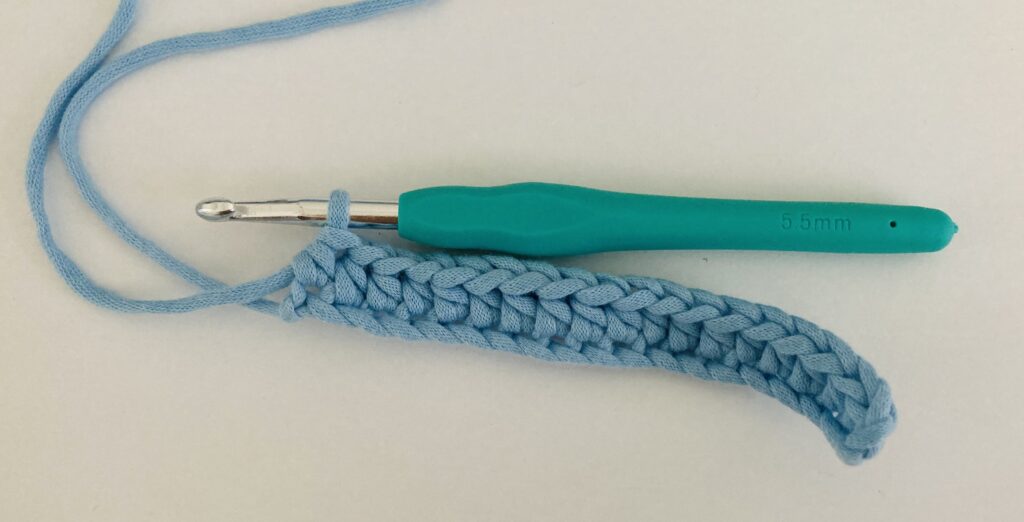
What do I do when I reach the end of the row?

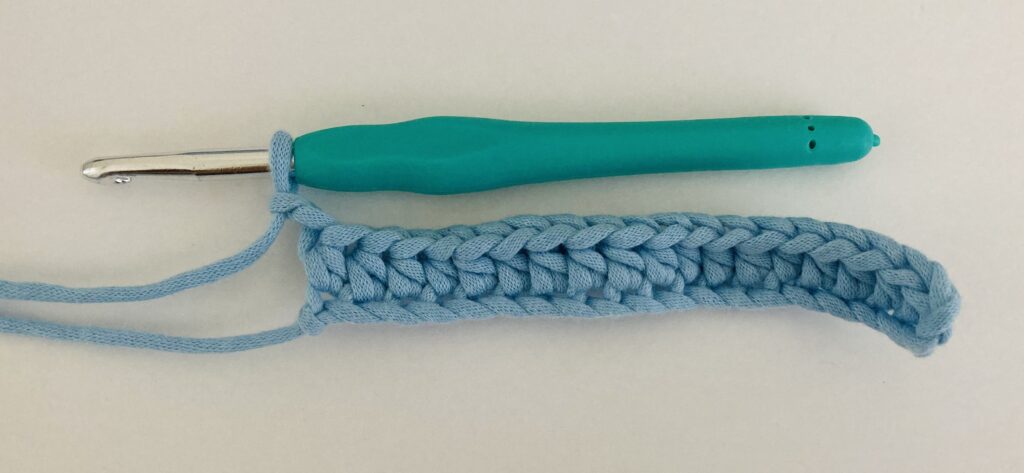
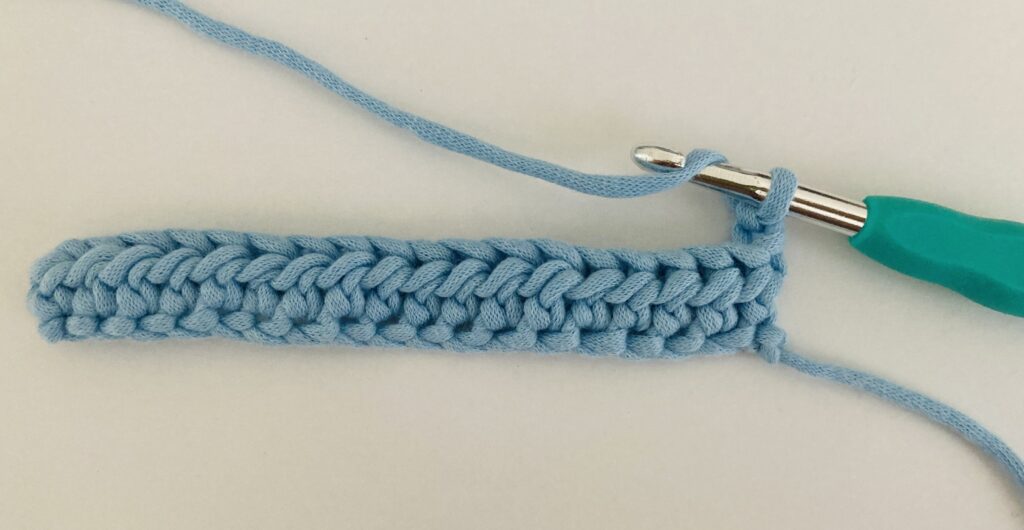
There’s a short and easy three step process when you reach the end of the row. Remember how at the beginning of your first half double crochet stitch, I mentioned that you have to insert your hook into the third stitch from your hook? That means that you left two chain stitches unworked. Keeping that in mind, at the end of the row, you chain 2 stitches, and then turn your work, or flip it. Then, you can begin to work more half double crochet stitches as mentioned before. Whenever you reach the end of a row, you can repeat this three step process and continue working half double crochets for as many rows as you like.
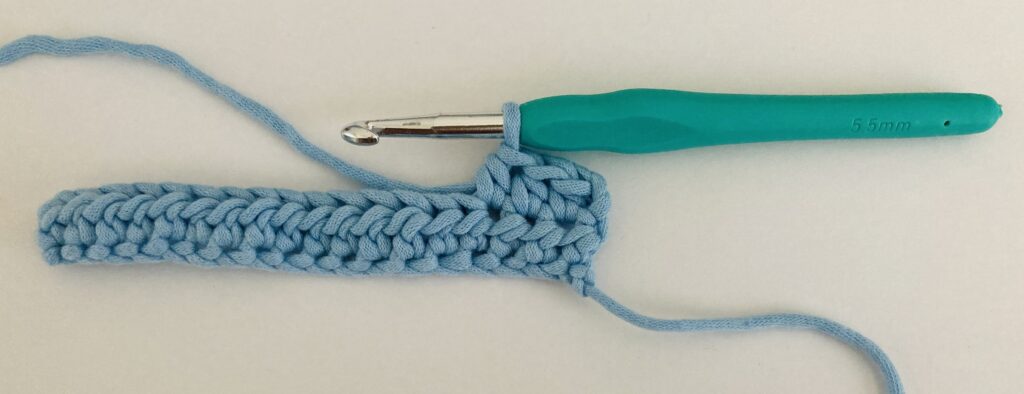
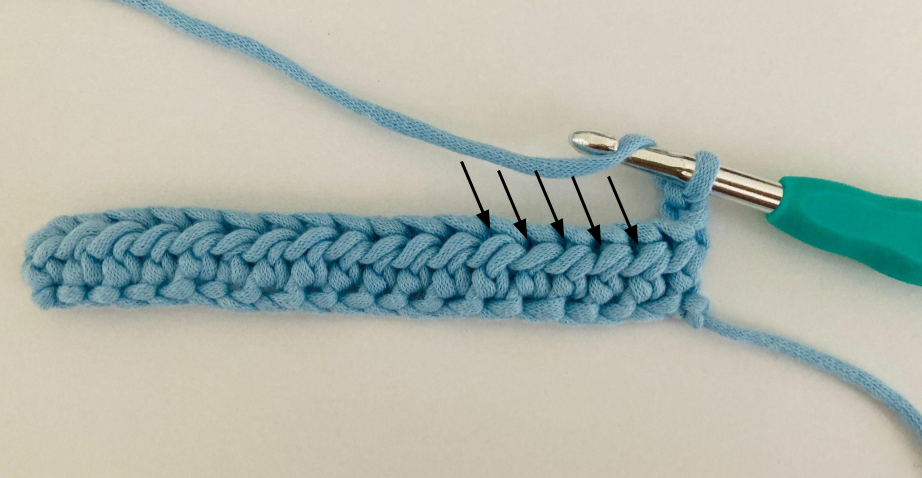
Important Note: When you are crocheting on any row that is after the 1st row of half double crochets, make sure that you insert your hook from the front of the v-shape to the back of the v-shape. In other words, you will have to insert your hook from the front of your work and the hook should come out of the back of your work. You should no longer be inserting your hook across the top of your stitches, but instead into the front of the stitches. You can see where to insert your crochet hook in the following image:
I’m having a hard time keeping the edges straight. How can I fix that?
If you are having a hard time keeping the edges straight, you can count the number of stitches that you work. In the above example, because we skipped two stitches at the beginning and worked our half double crochet in the 18th stitch, we will have 18 stitches in total. As such, you can count each stitch as you make them and make sure there are 18. If it is too hard to keep track of where to put your stitches, you can mark them with stitch markers. I recommend stitch markers that look like plastic safety pins. These are great because they won’t fall out of your yarn easily because there is a clasp to open and close them. When using plastic stitch markers, you can mark each stitch, or if you have a hard time keeping the edges straight, you can mark the last stitch on the chain with a stitch marker, and move it up each row. This would allow you to keep track of exactly where the end of the row is so that you can chain two and turn your work once you create a stitch in the stitch where your stitch marker was at the end of the row.
Conclusion
I hope this half double crochet pattern for beginners helped you get a better understanding of how to crochet a half double crochet stitch. By acquiring knowledge about how to do half double crochet, you can embark on the journey of creating more complex crochet projects, and maybe even learn about foundation half double crochet and the differences and similarities it has with a regular chain. I hope to publish some posts about foundation crochet in the future as well, so stay tuned! Happy Crocheting!

Leave a Reply